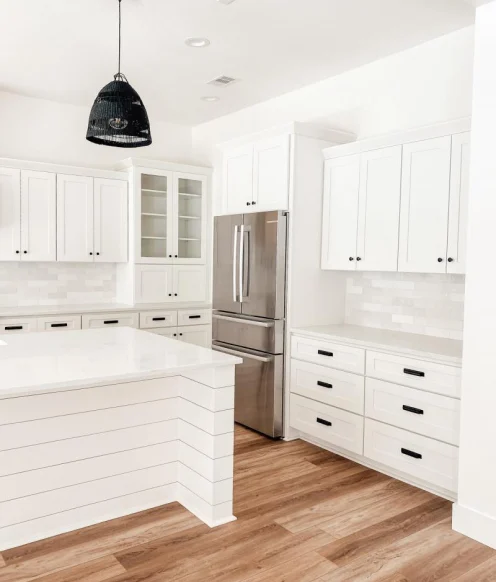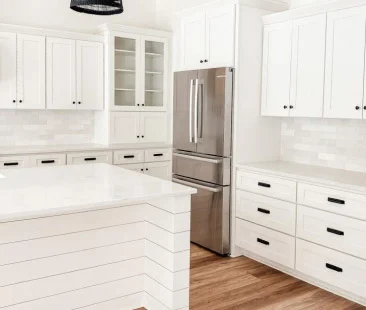

Installing kitchen cabinets on your own can feel like a major lift—literally. But with the right tools, planning, and safety tips, DIY cabinet installation is absolutely doable—even solo. Whether you’re taking on a full remodel or replacing upper cabinets as part of a weekend upgrade, this guide walks you through how to safely lift and install kitchen cabinets by yourself.
We’ll cover:
- How to lift kitchen cabinets without injuring your back
- Pro tips for installing upper cabinets solo
- Common mistakes DIYers make (and how to avoid them)
- Tools that make the job easier—and safer
Let’s get into it.
Can You Really Install Cabinets Alone?
Yes, you can install cabinets by yourself—but with a few important caveats.
If you’re confident in your DIY skills, have the right tools, and are working with flat-pack or RTA cabinets, solo installation is realistic. However, if you’re dealing with oversized units or have mobility limitations, it’s smart to have a second set of hands or use mechanical assistance.
At RTA Cabinet Store, many of our customers are self-starting DIYers. That’s why we offer flexible options—like assembled or flat-pack cabinets, 3D step-by-step instructions via the BILT app, and free design help—to make installation easier from the start.
Tools You’ll Need
Before lifting a single cabinet, gather these essential tools:
- Stud finder
- Tape measure
- Pencil and level
- Drill with screwdriver bits
- Wood screws (2.5–3 inches)
- Cabinet jack or DIY ledger board
- Step ladder
- Safety gloves and protective eyewear
Optional but helpful:
- Cabinet lift (rented or purchased)
- Painter’s tape for layout visualization
- Shims for leveling base cabinets
- A 1 x 4 to use as a ledger board
Looking for a full assembly and installation checklist? Check out our Guide to Cabinet Assembly or check out this video for installation instructions.
How to Lift Kitchen Cabinets Safely
Wall cabinets are lighter than base cabinets but still awkward to lift solo. Here’s how to protect your body and your investment:
Step 1: Remove Cabinet Doors
Take off the doors and shelves before lifting. This reduces weight and prevents damage during the install.
Step 2: Use Proper Lifting Technique
- Bend your knees—not your back
- Keep the cabinet close to your body
- Lift using your legs and core
- Never twist while holding a cabinet
Step 3: Use a Ledger Board or Cabinet Jack
If you’re working solo, install a temporary ledger board (a 1×4 screwed into the wall under your layout line) or rent a cabinet jack to hold the cabinet in place while you secure it.
Supporting Cabinets During Installation
Whether you’re lifting cabinets by yourself or with help, stabilizing them while securing is key.
Option 1: The Ledger Board Method (DIY Friendly)
- Mark your cabinet layout line on the wall
- Screw a level 1×4 board into the studs
- Rest the cabinet bottom on the board while securing
Option 2: Use a Cabinet Jack (No Hands Required)
A cabinet jack safely lifts and holds the cabinet at the right height, allowing you to fasten it in place without relying on a second person. These are widely available for rent at hardware stores.
Need help with cabinet alignment and leveling? Our Free Design Service can give you a layout optimized for easy installation.
Step-by-Step Guide to Installing Upper Cabinets
- Find and mark the wall studs
- Use a stud finder and pencil to mark stud centers
- Measure and mark your cabinet layout
- Standard height: 18” between base and wall cabinets
- Install a ledger board or set your cabinet jack
- Lift and position the cabinet
- Align the top and side edges to your layout
- Drill pilot holes and fasten into studs
- Use at least two 3” cabinet screws per stud
- Check for level and plumb
- Shim if needed before final tightening
- Repeat with the next cabinet
- Clamp cabinets together and secure through face frames
Common Mistakes to Avoid
Even confident DIYers can run into these avoidable issues:
❌ Not securing into studs
Drywall anchors won’t hold the weight—always find studs.
❌ Skipping the ledger board
Holding cabinets mid-air while drilling is a recipe for damage.
❌ Lifting too soon
Have all tools prepped and ready before you start lifting.
Final Tips for a Flawless Finish
- Use painter’s tape to visualize placement before committing
- Leave cabinet doors off until installation is complete
- Use RTA Cabinet Store’s pre-assembled option if you want to skip the flat-pack assembly process entirely
Pro Tip: Get Help From the BILT App
RTA Cabinet Store partners with BILT® to offer 3D step-by-step instructions for many of our products. This makes installation even easier—especially for first-timers.
Ready to Build It Yourself?
If you’re ready to take on a solo cabinet install, make sure you’ve got the right product, plan, and support. With RTA Cabinet Store, you get:
✅ Cabinets shipped in 3 days or less with Quick Ship Guarantee™
✅ Free professional kitchen design
✅ Fully refundable samples to see it before you commit