
Assembling your own cabinets might sound intimidating, especially if you’ve never done it before. But don’t worry—RTA cabinets are made with beginners in mind. With a few basic tools, some prep, and the right support (we’ll show you where to find it), your DIY cabinet project can be both manageable and rewarding.
Let’s walk through what you can expect—and how RTA Cabinet Store makes it easier than ever.
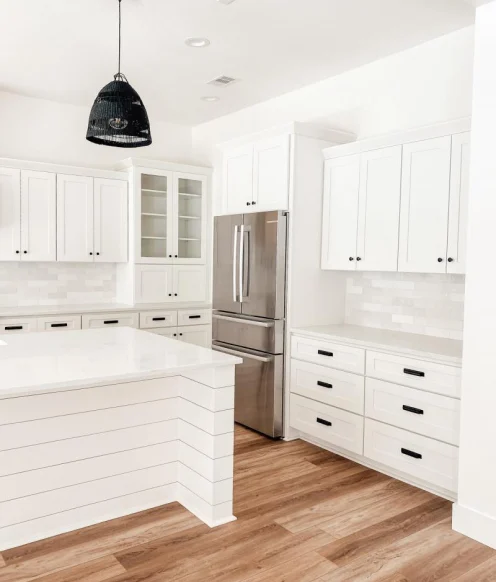
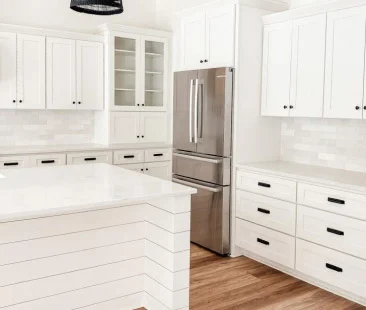
Why RTA Cabinets Are a Smart Choice
Flat-pack RTA cabinets offer the same high-quality materials as pre-assembled ones but come at a more affordable price point. Why? Because you do the final step: the assembly.
These cabinets are designed for everyday homeowners—not professional contractors (although contractors love them). They’re made to be simple, straightforward, and yes—DIY-friendly.
At RTA Cabinet Store, we go a step further by offering:
- Step-by-step instructions (printed and digital)
- Customer support that helps when you call
It’s all part of our mission to empower dreamers and doers like you.
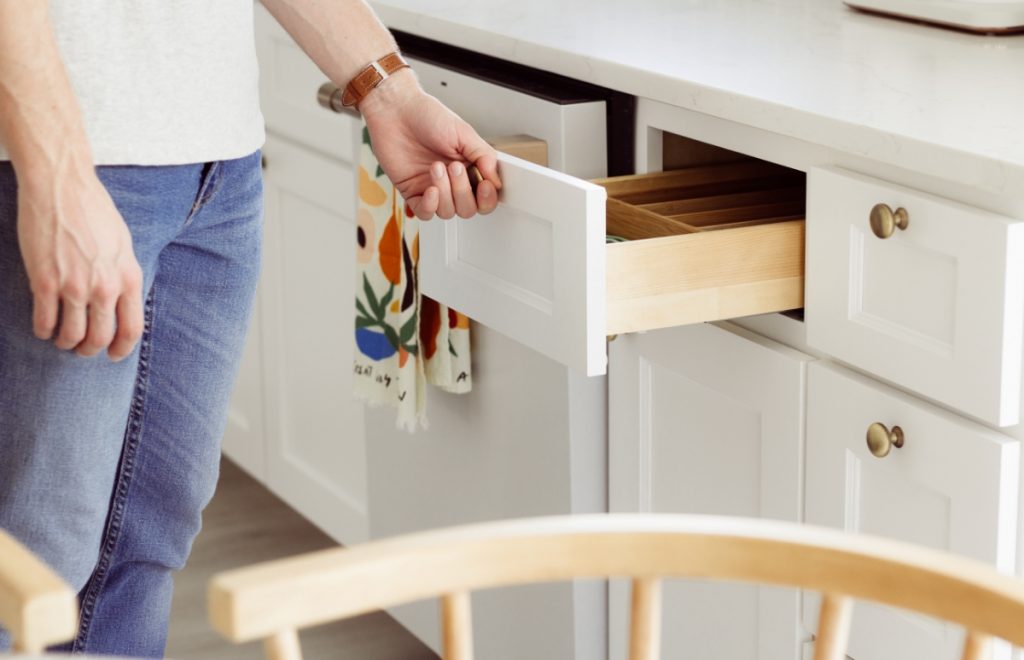
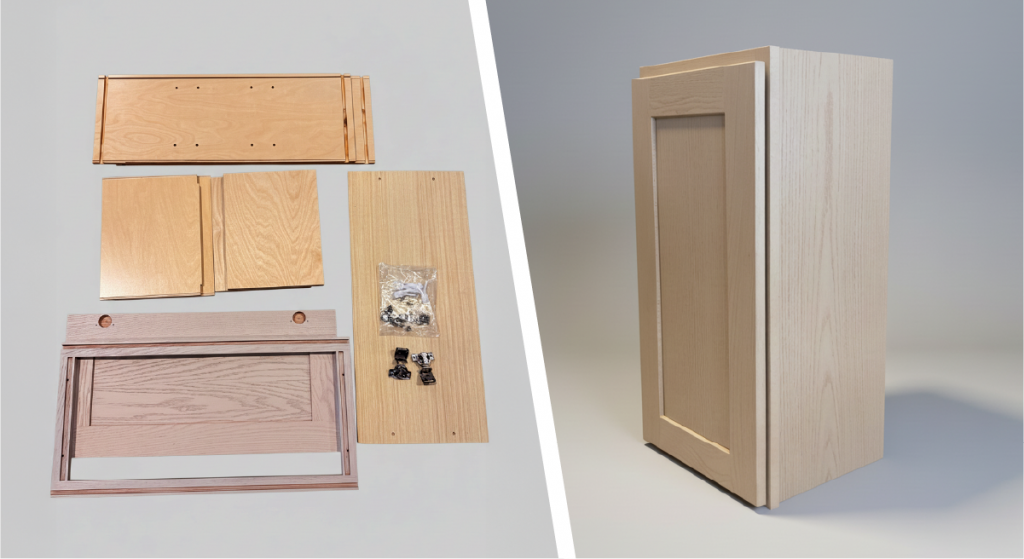
What’s Inside the Box?
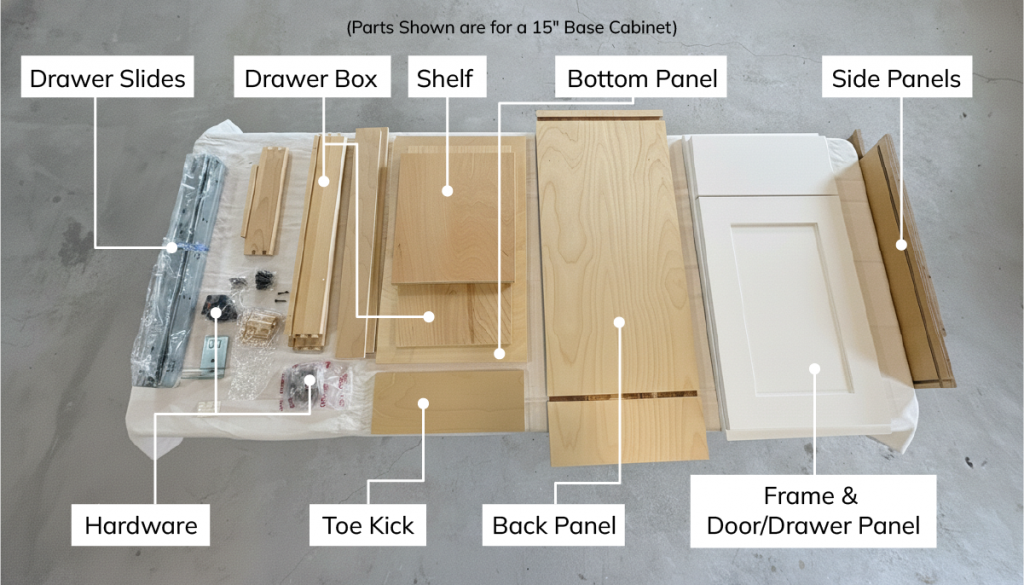
When your cabinets arrive, you’ll find everything you need neatly packed and labeled, including:
- Cabinet panels and doors
- Hardware (screws, hinges, cams)
- Step-by-step instructions
Most of our customers are surprised by how well-organized the kits are—and how doable the process becomes once they start.
Pro Tip: Set aside a clean, open area for assembly. A kitchen floor, garage, or dining room works great.
Tools You’ll Need (Hint: You Already Own Most of Them)
No need to buy specialty tools. Here’s what most first-time assemblers use:
- Staple gun
- Glue
- A rubber mallet
- Painter’s tape (for marking alignment)
That’s it! Many first-timers are surprised at how few tools it actually takes to build beautiful cabinets.
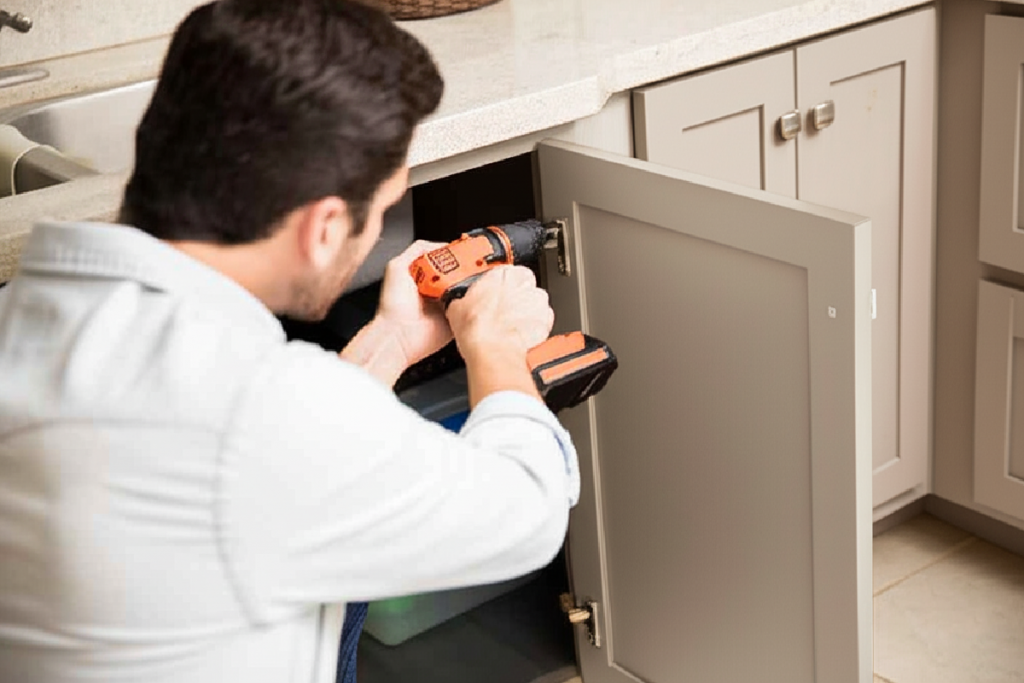
How to Assemble Your First RTA Cabinet: Step-by-Step
Here’s a simplified overview of the typical RTA cabinet assembly process:
Step 1: Unpack and Organize
- Lay out all parts and hardware
- Use the labels to identify each panel and fastener
- Review the included instruction sheet
Step 2: Assemble the Cabinet Box
- Attach side panels to the bottom panel using cam locks or screws
- Secure the back panel in place
- Make sure everything is square and flush before tightening
Step 3: Attach the Top (if applicable)
- Some base cabinets have a top panel; others are open for countertops
- Install any internal supports or braces if included
Step 4: Install Shelves and Drawer Glides
- Slide in any adjustable shelves
- Attach drawer hardware (glides or tracks) if part of your design
Step 5: Add the Doors and Drawers
- Use the pre-drilled holes to attach hinges
- Mount the doors and adjust alignment
- Slide in drawers (most come pre-assembled or require minimal setup)
Step 6: Final Touches
- Add bumpers, hardware (knobs/pulls), and toe kicks
- Wipe down surfaces
- Admire your work—you built a cabinet!
How Long Will Assembly Take?
This depends on your skill level and the size of your project. But for a single cabinet, most beginners complete assembly in about 30–60 minutes per cabinet. After your first few, you’ll pick up speed.
If you’re assembling an entire kitchen, break it up into smaller tasks. Do one cabinet at a time, and you’ll build confidence as you go.
Tips for a Smooth First Assembly
Even if you’ve never assembled furniture before, you’ve got this. Here are a few tips that’ll make the experience easier:
- Read the instructions all the way through before you start.
- Consult our online instructions and videos for your specific cabinets.
- Lay out all the parts and hardware.
- Don’t rush—take your time to avoid mistakes.
- Ask for help if needed. It’s a great weekend project for two.
Remember: You can always reach out to the RTA Cabinet Store support team for guidance or reassurance. We have the best post-purchase support in the industry.
You’re Not Alone—We’re with You Every Step
One of the best things about shopping with RTA Cabinet Store is the level of support you receive:
- Clear, detailed instructions
- Access to support reps who actually know cabinets
- A library of video guides, tips, and troubleshooting resources
We’re not just a store—we’re your partner in creating a space you love.
The Benefits Go Beyond Assembly
Aside from saving money, building your own cabinets gives you:
- A huge sense of accomplishment
- More control over your remodel timeline
- Flexibility to install at your own pace
- Peace of mind knowing you assembled it right
Your first RTA cabinet project doesn’t have to be stressful. With intuitive designs, organized packaging, and expert support from RTA Cabinet Store, you’ll go from beginner to confident DIYer in no time.
Take the leap—you’re more capable than you think.
FAQs
Can I assemble RTA cabinets by myself?
Yes! Most RTA cabinets are designed to be assembled by one person. The process is beginner-friendly, and you don’t need professional experience. However, for large or wall cabinets, having a second person can be helpful for lifting or aligning parts.
How long does it take to assemble a cabinet?
For first-time users, expect to spend 30 to 60 minutes per cabinet. Once you’ve assembled one or two, the process becomes faster and more intuitive.
Are the instructions easy to follow?
Yes. Every cabinet comes with step-by-step printed instructions and part labels. Plus, RTA
What if I get stuck during assembly?
You’re never alone. RTA Cabinet Store provides:
- Assembly video guides
- Live customer support
We’re here to walk you through it.
Is assembling RTA cabinets worth the effort?
Absolutely. Assembling your cabinets can:
- Save you hundreds (or thousands) on installation costs
- Give you more control over your remodel
- Build confidence for future DIY projects