 Refundable Samples →

RTA Kitchen Cabinets
65 Kitchen Cabinets Lines


25%
↓

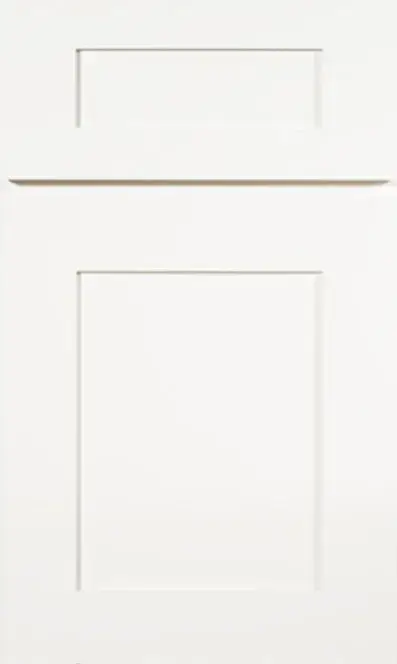
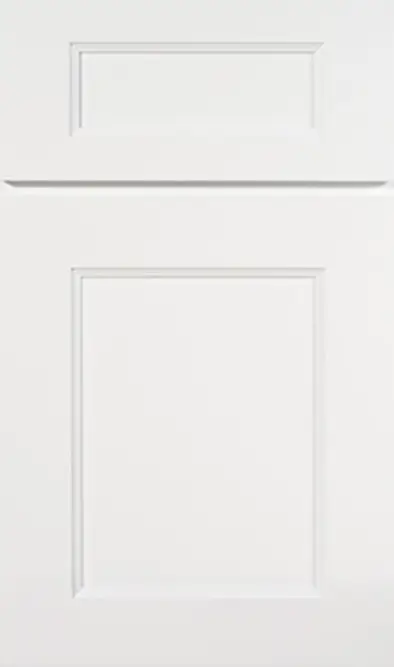
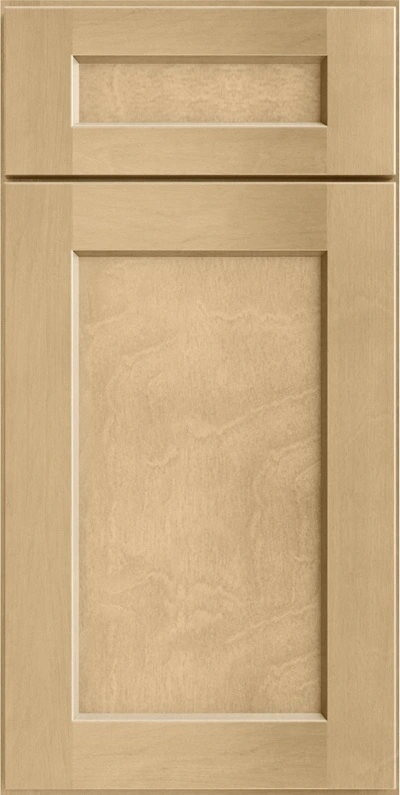
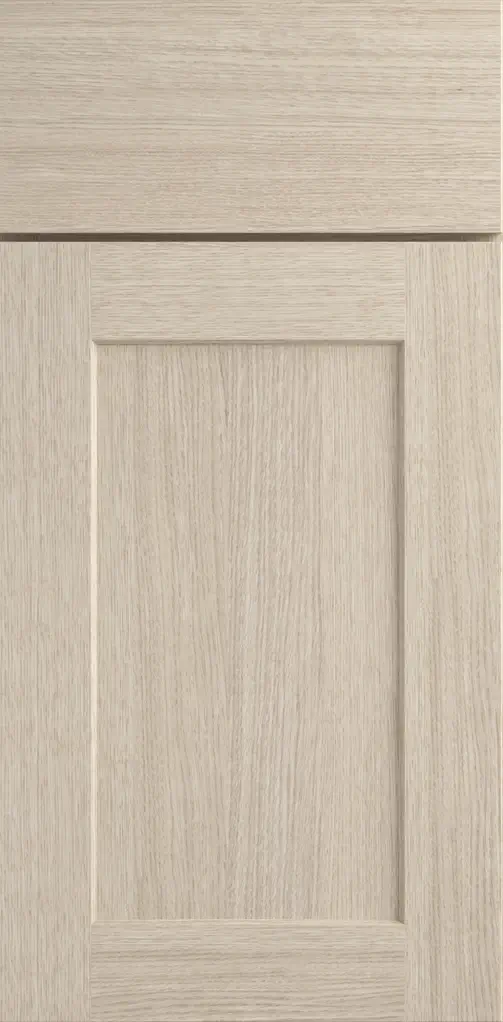
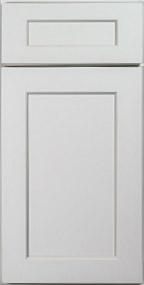
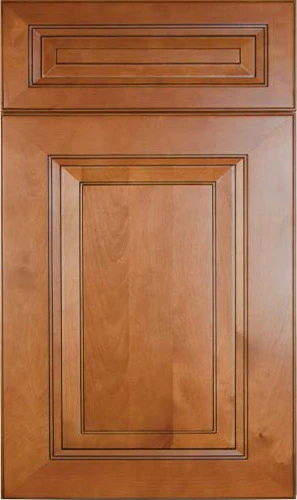
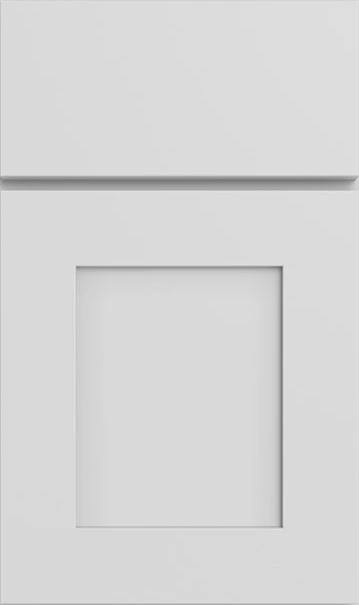
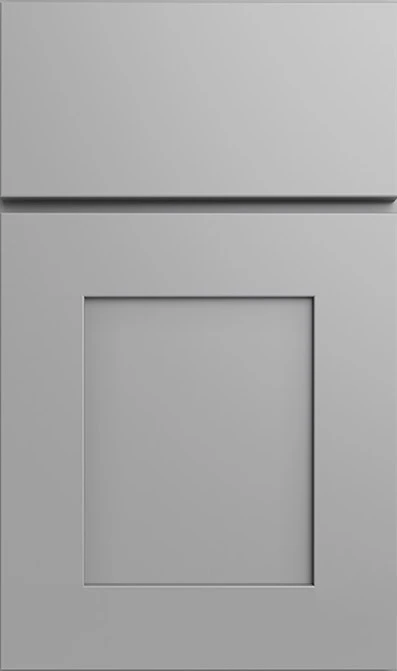
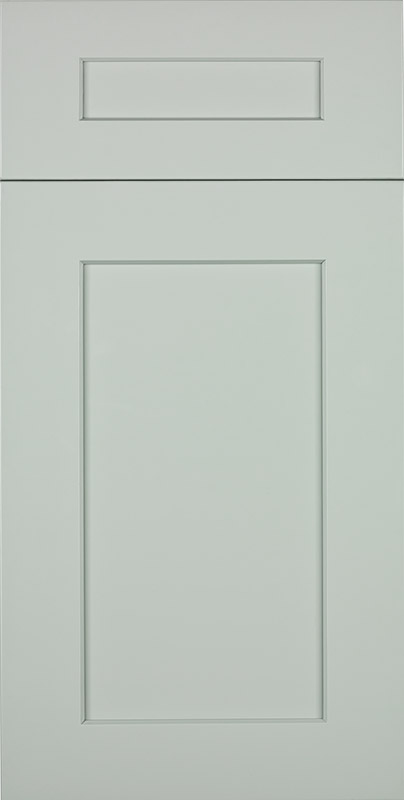
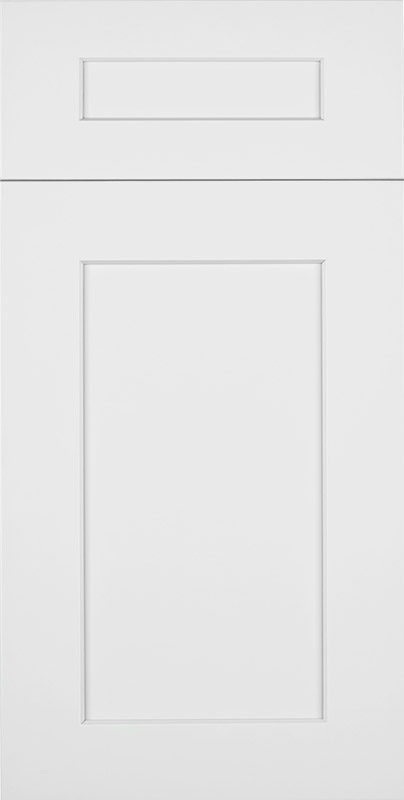
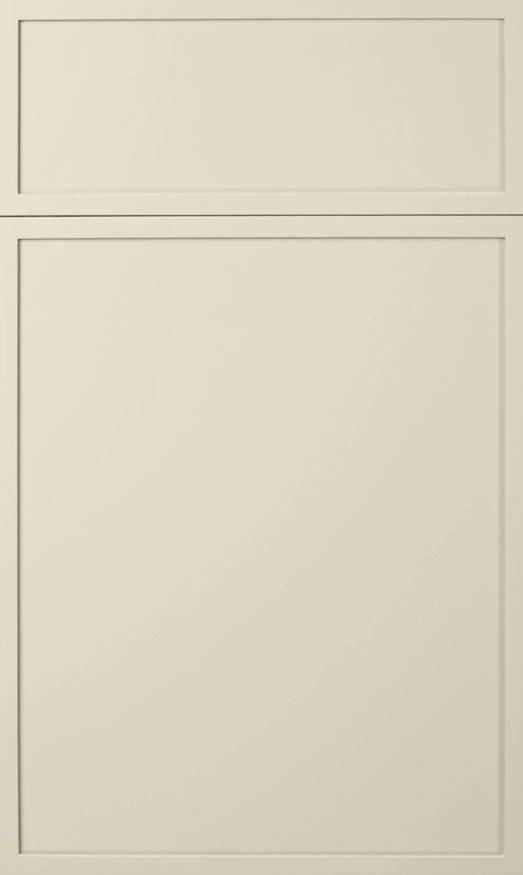
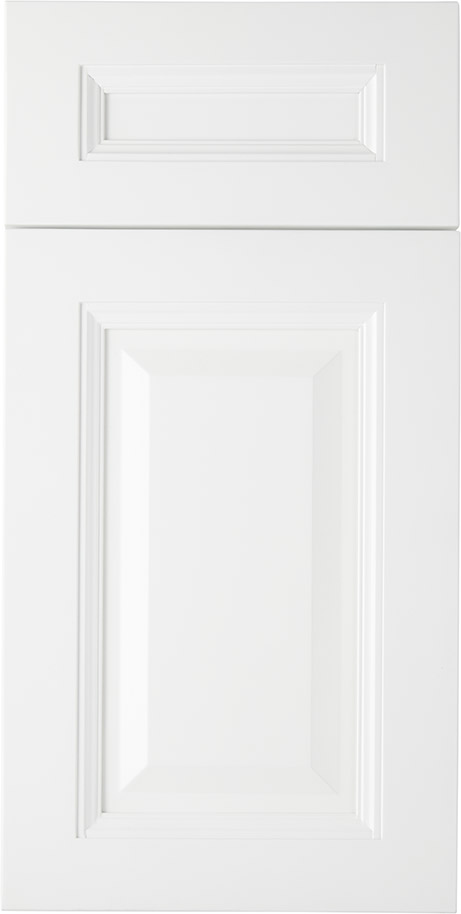
Weston White Shaker RTA Cabinets
- Best Seller
- Quick Ship
Basic Kitchen Starting at
Order Sample Door
Preview Style
$2025
$1533
(25%↓)
25%
↓

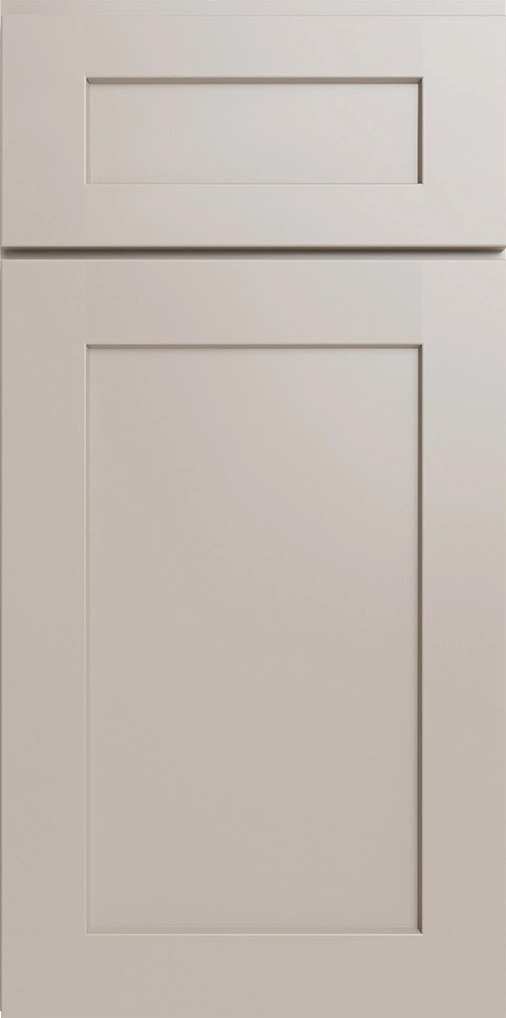
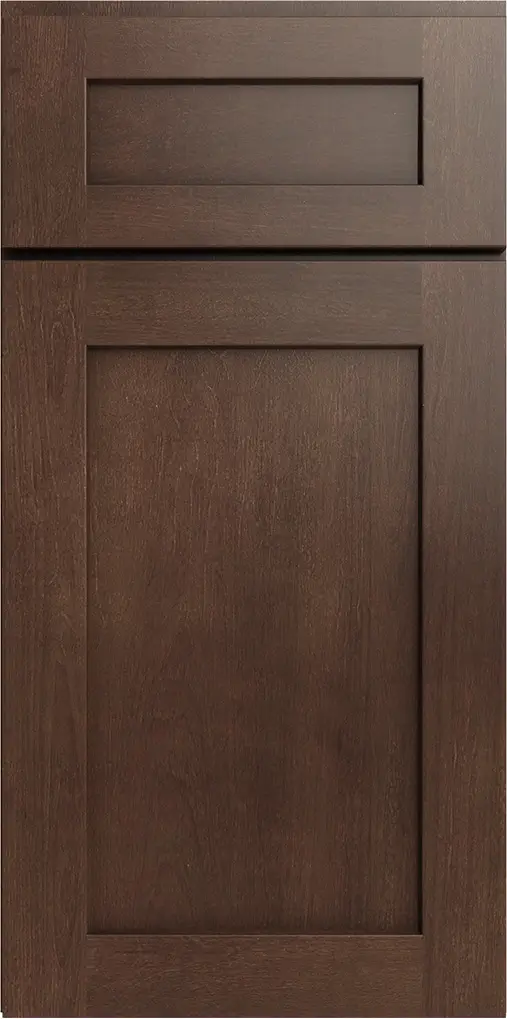
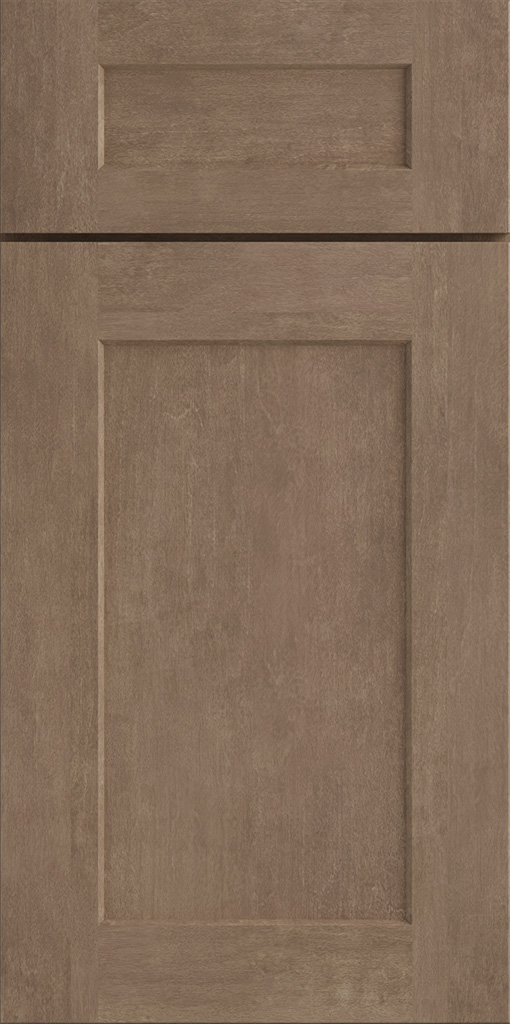
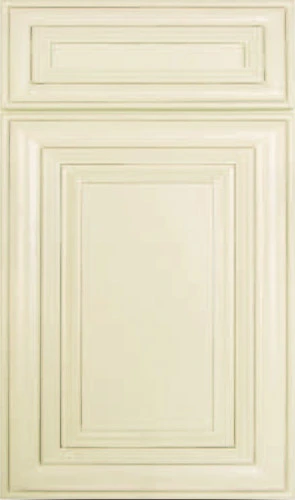
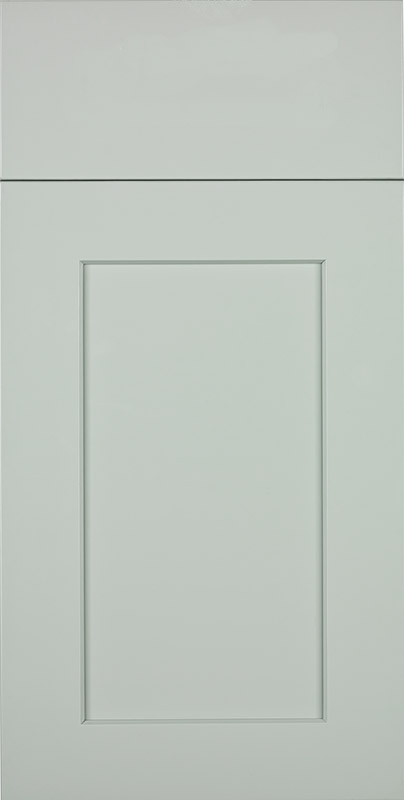
Weston Sand Shaker RTA Cabinets
- Best Seller
- Quick Ship
Basic Kitchen Starting at
Order Sample Door
Preview Style
$2079
$1559
(25%↓)
25%
↓

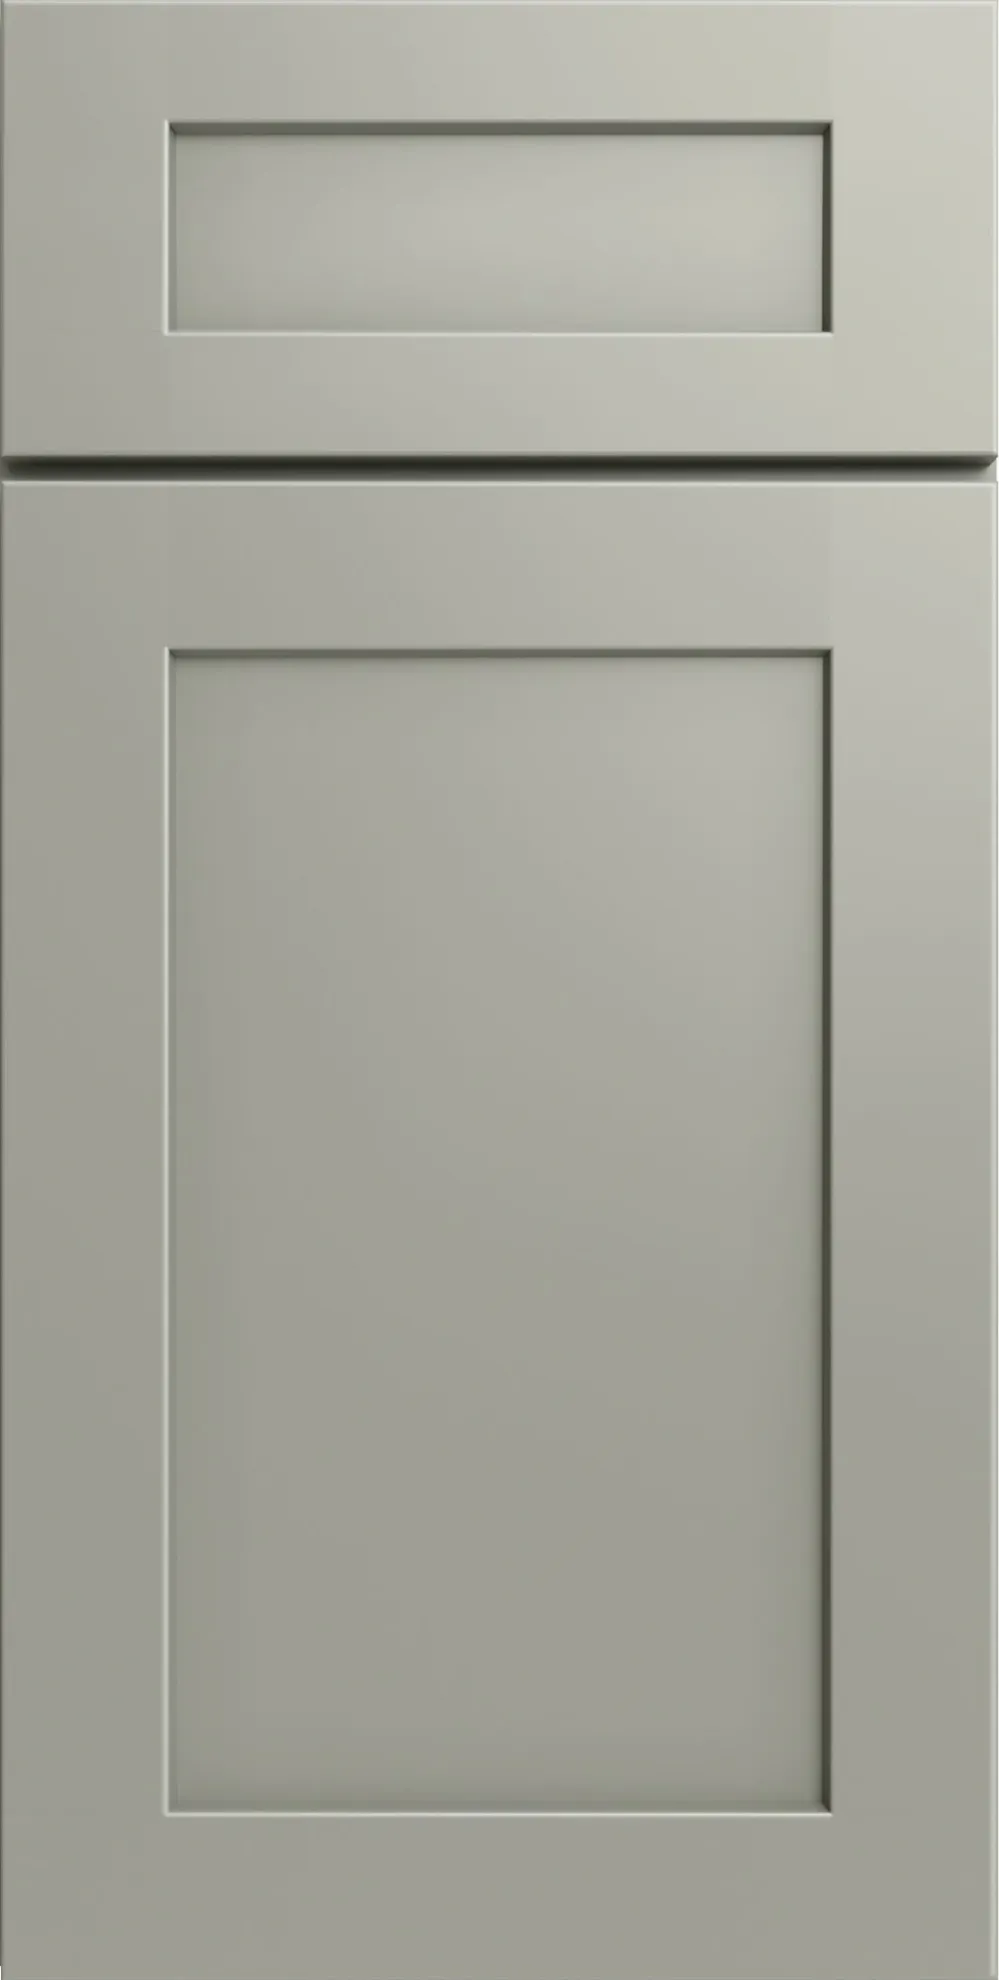
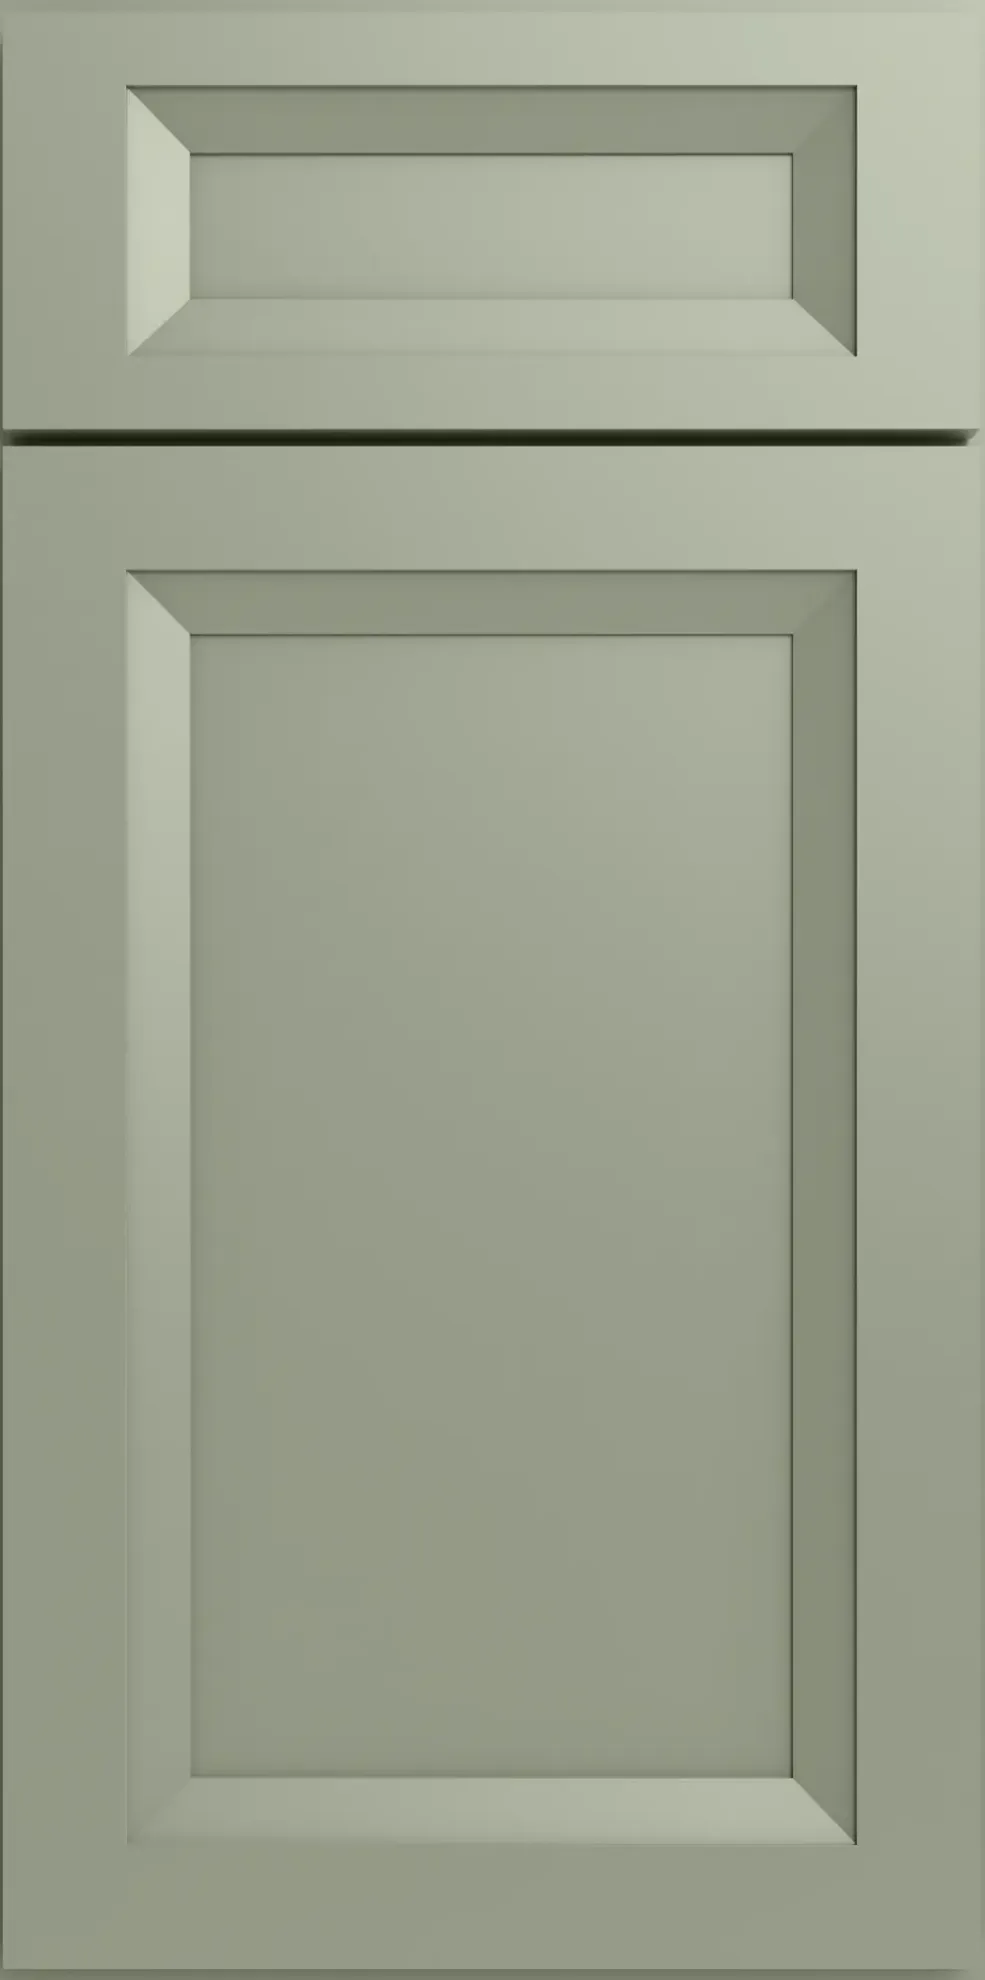
Sage Green Shaker RTA Cabinets
- Quick Ship
- New
Basic Kitchen Starting at
Order Sample Door
Preview Style
$2664
$2264
(25%↓)
25%
↓

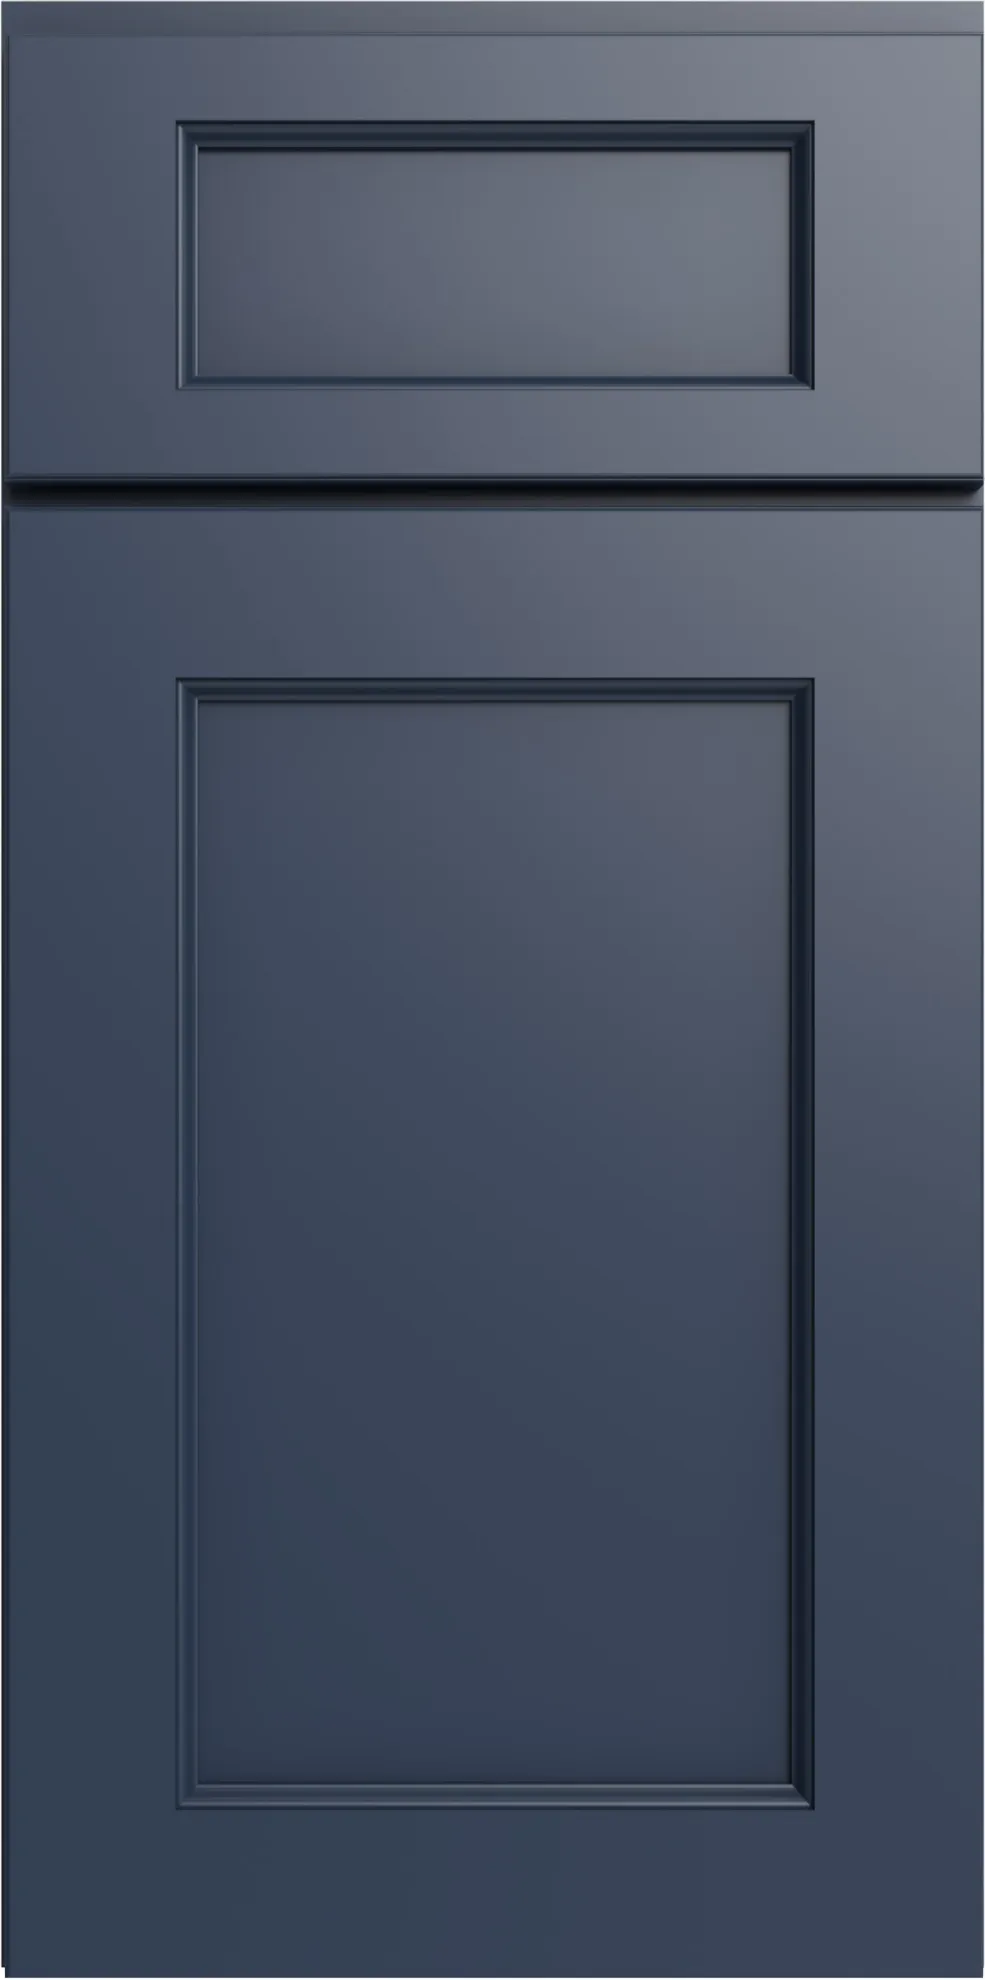
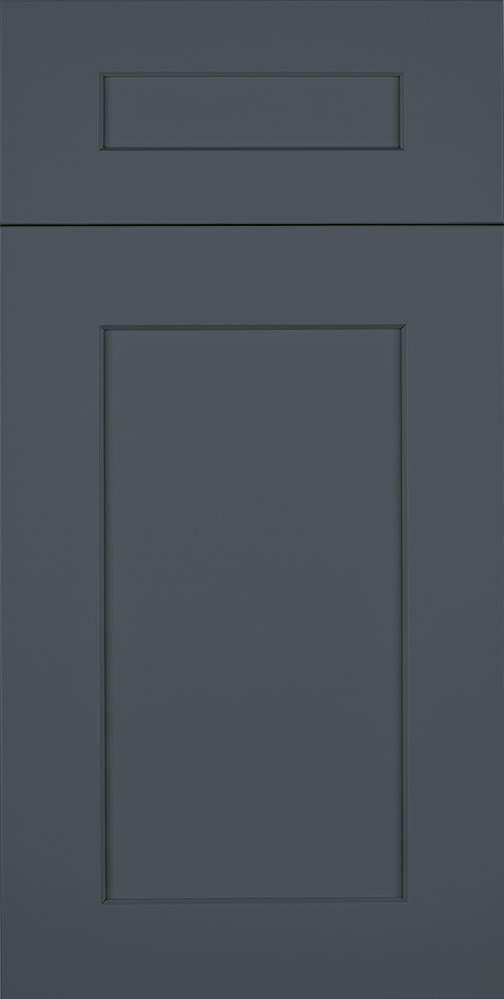
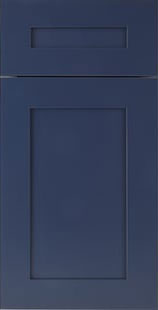
Florence Midnight Blue RTA Cabinets
- Best Seller
- Quick Ship
Basic Kitchen Starting at
Order Sample Door
Preview Style
$2058
$1544
(25%↓)
25%
↓

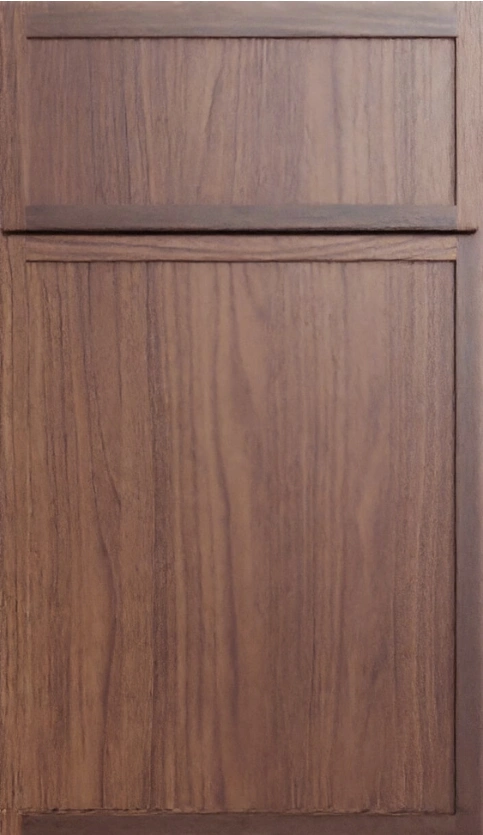
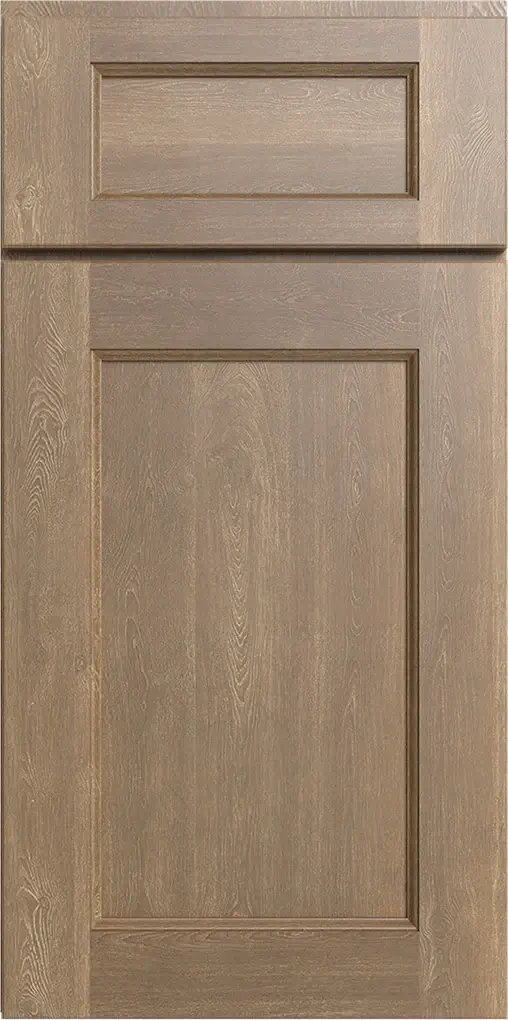
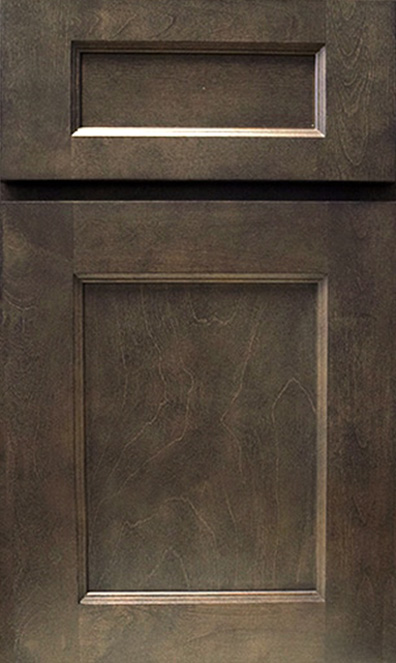
Slim Walnut Shaker RTA Cabinets
- Quick Ship
- New
Basic Kitchen Starting at
Order Sample Door
Preview Style
$2563
$2178
(25%↓)
25%
↓

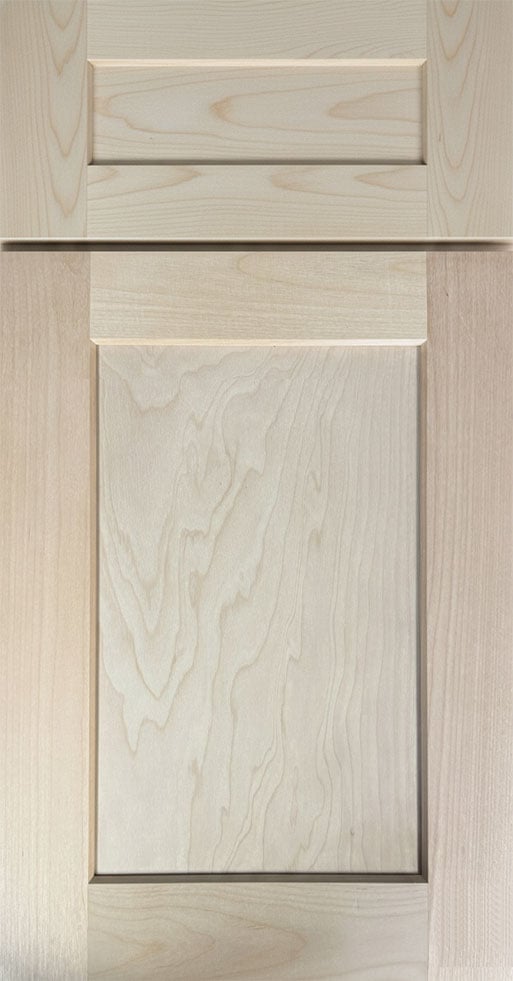
Slim White Shaker RTA Cabinets
- Quick Ship
Basic Kitchen Starting at
Order Sample Door
Preview Style
$2026
$1520
(25%↓)

25%
↓

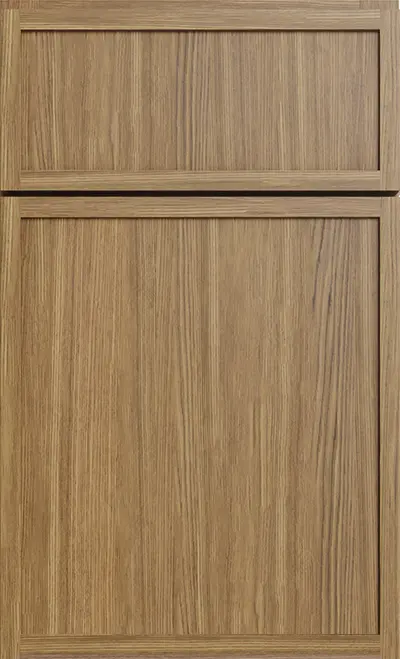
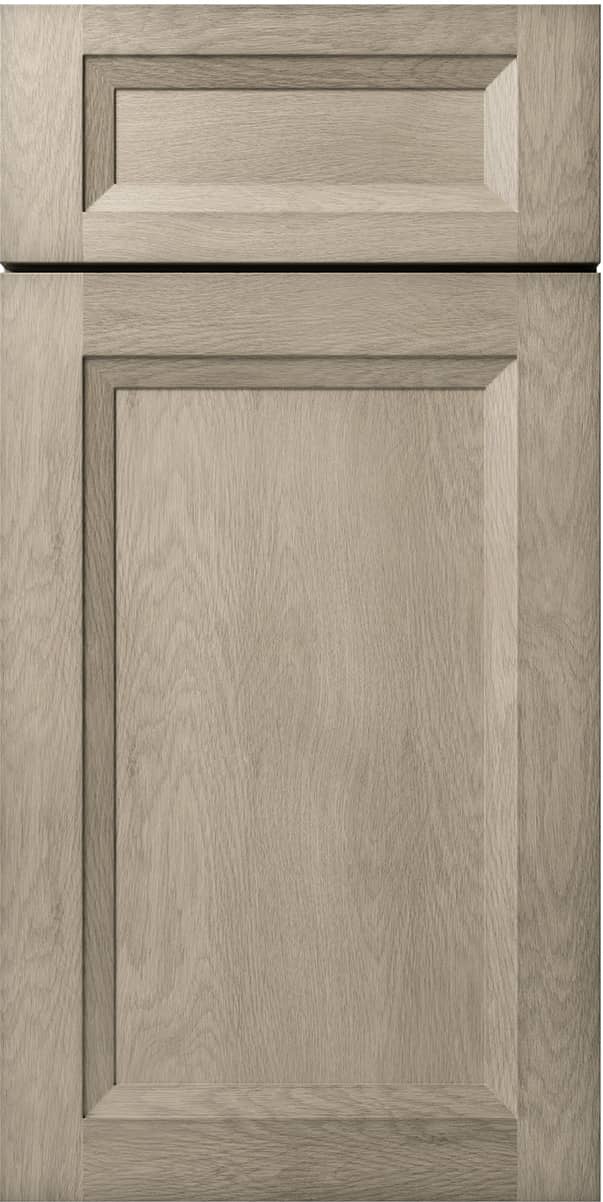
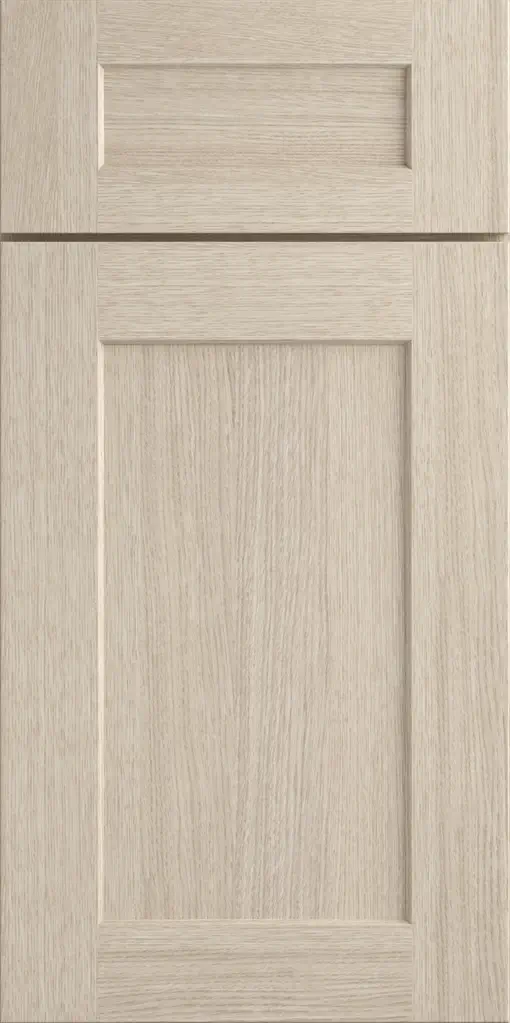
Slim White Oak RTA Cabinets
- Quick Ship
Basic Kitchen Starting at
Order Sample Door
Preview Style
$2513
$1884
(25%↓)
25%
↓

Florence Grey Shaker RTA Cabinets
- Best Seller
- Quick Ship
Basic Kitchen Starting at
Order Sample Door
Preview Style
$2133
$1600
(25%↓)
25%
↓

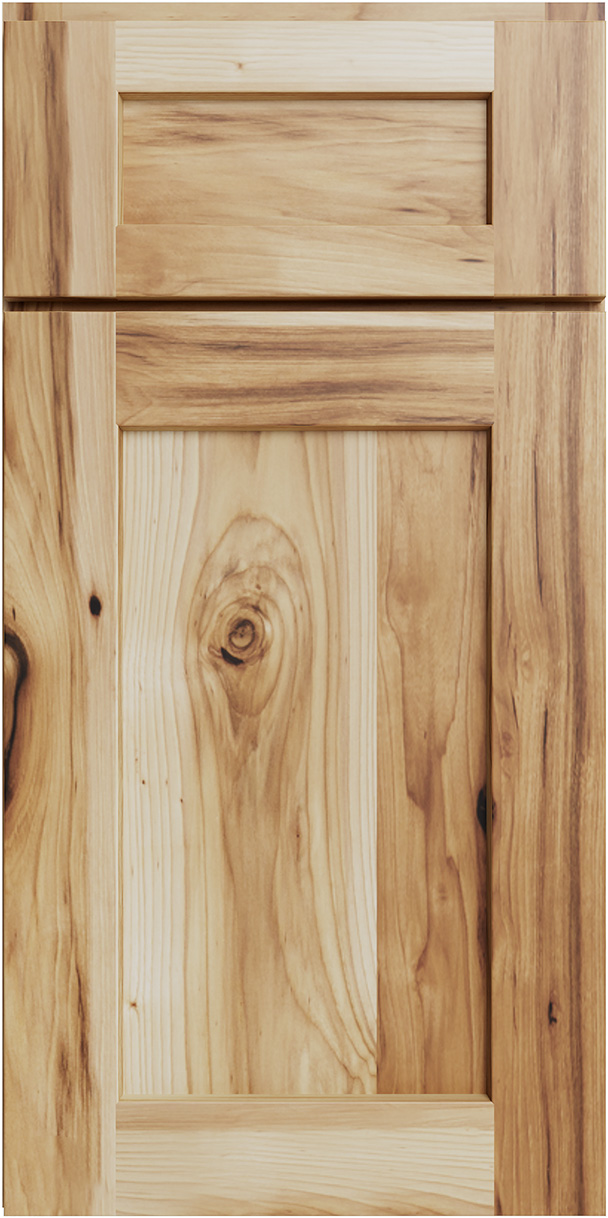
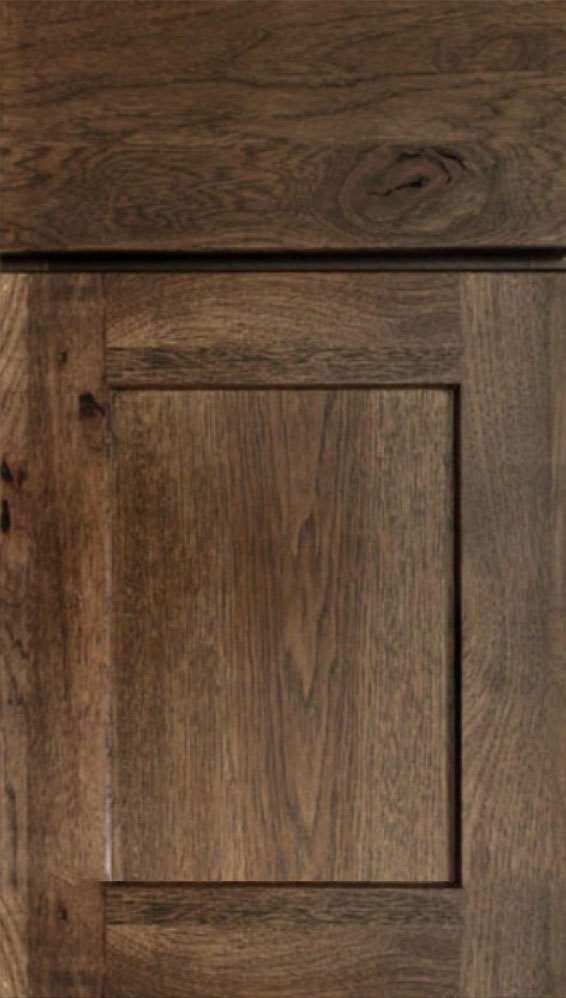
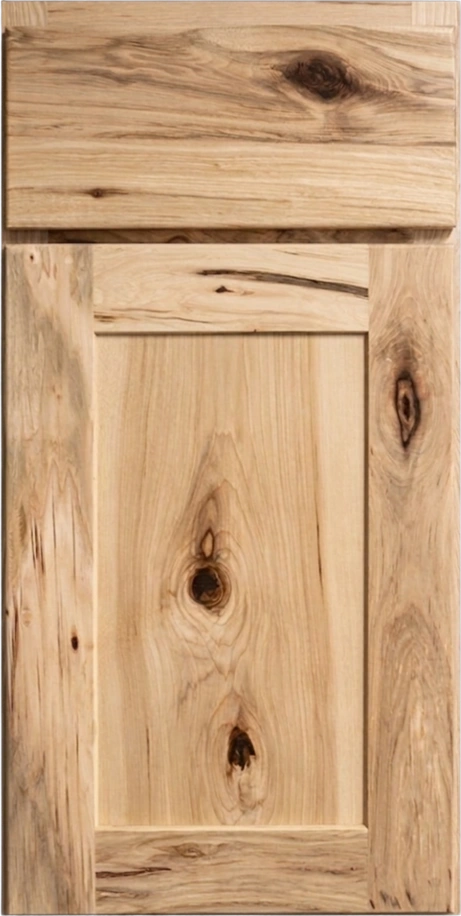
Natural Hickory Shaker RTA Cabinets
- Best Seller
- Quick Ship
Basic Kitchen Starting at
Order Sample Door
Preview Style
$2164
$1623
(25%↓)
25%
↓

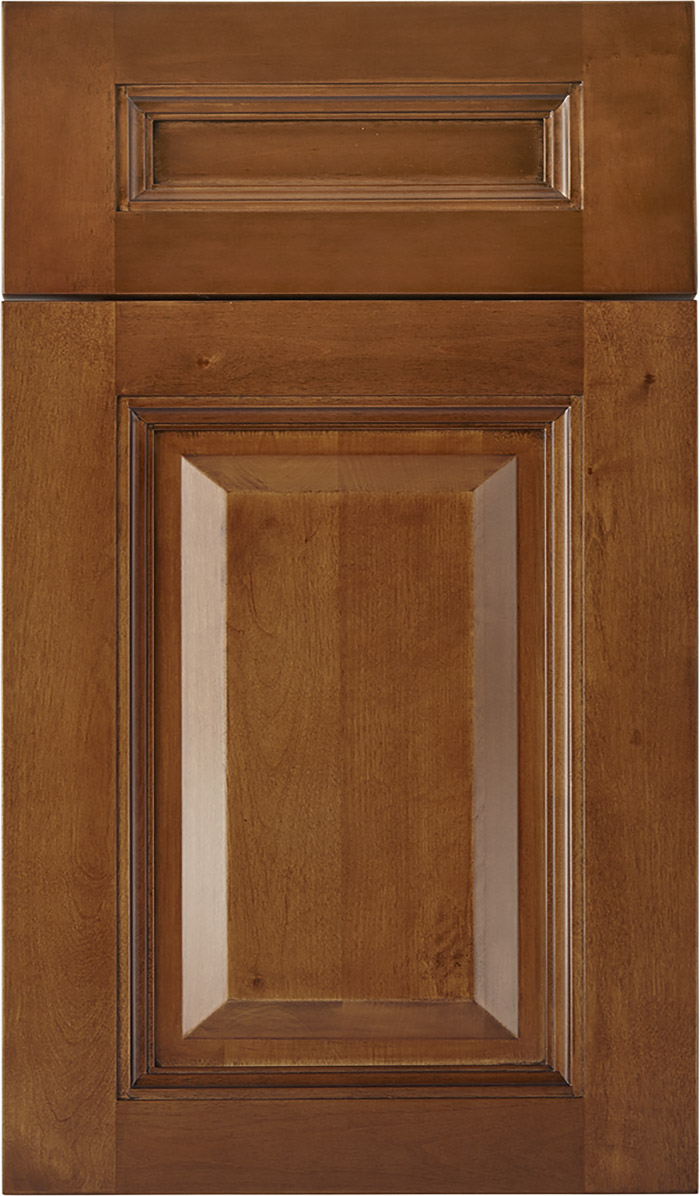
Timber Green RTA Cabinets
Basic Kitchen Starting at
Order Sample Door
Preview Style
$2485
$1864
(25%↓)
25%
↓

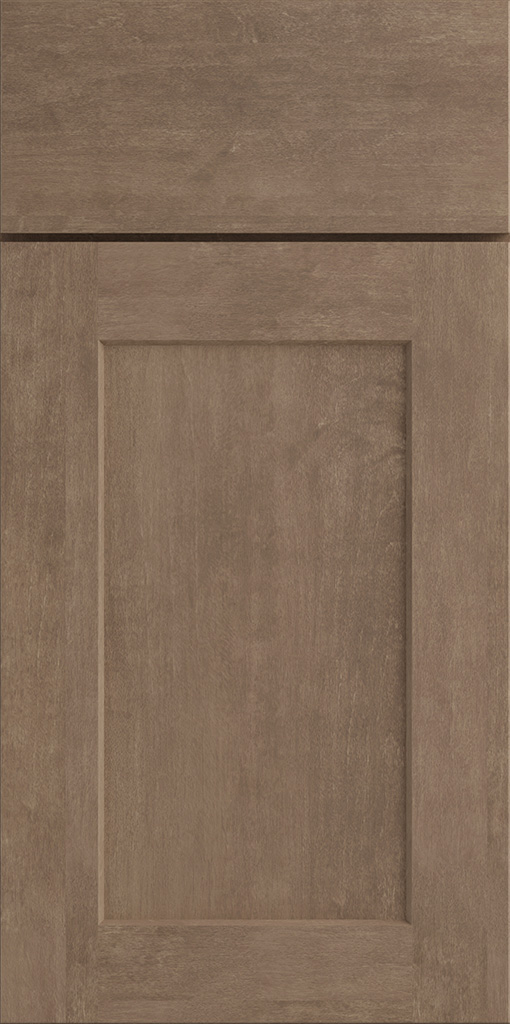
Timber Toffee RTA Cabinets
Basic Kitchen Starting at
Order Sample Door
Preview Style
$2211
$1658
(25%↓)

- Refundable Samples
- 0% APR Financing
- Lowest Price Guarantee
- Fast Cabinet Shipping
25%
↓

Timber Mist RTA Cabinets
Basic Kitchen Starting at
Order Sample Door
Preview Style
$2211
$1658
(25%↓)
25%
↓

Timber White RTA Cabinets
Basic Kitchen Starting at
Order Sample Door
Preview Style
$2485
$1864
(25%↓)
25%
↓

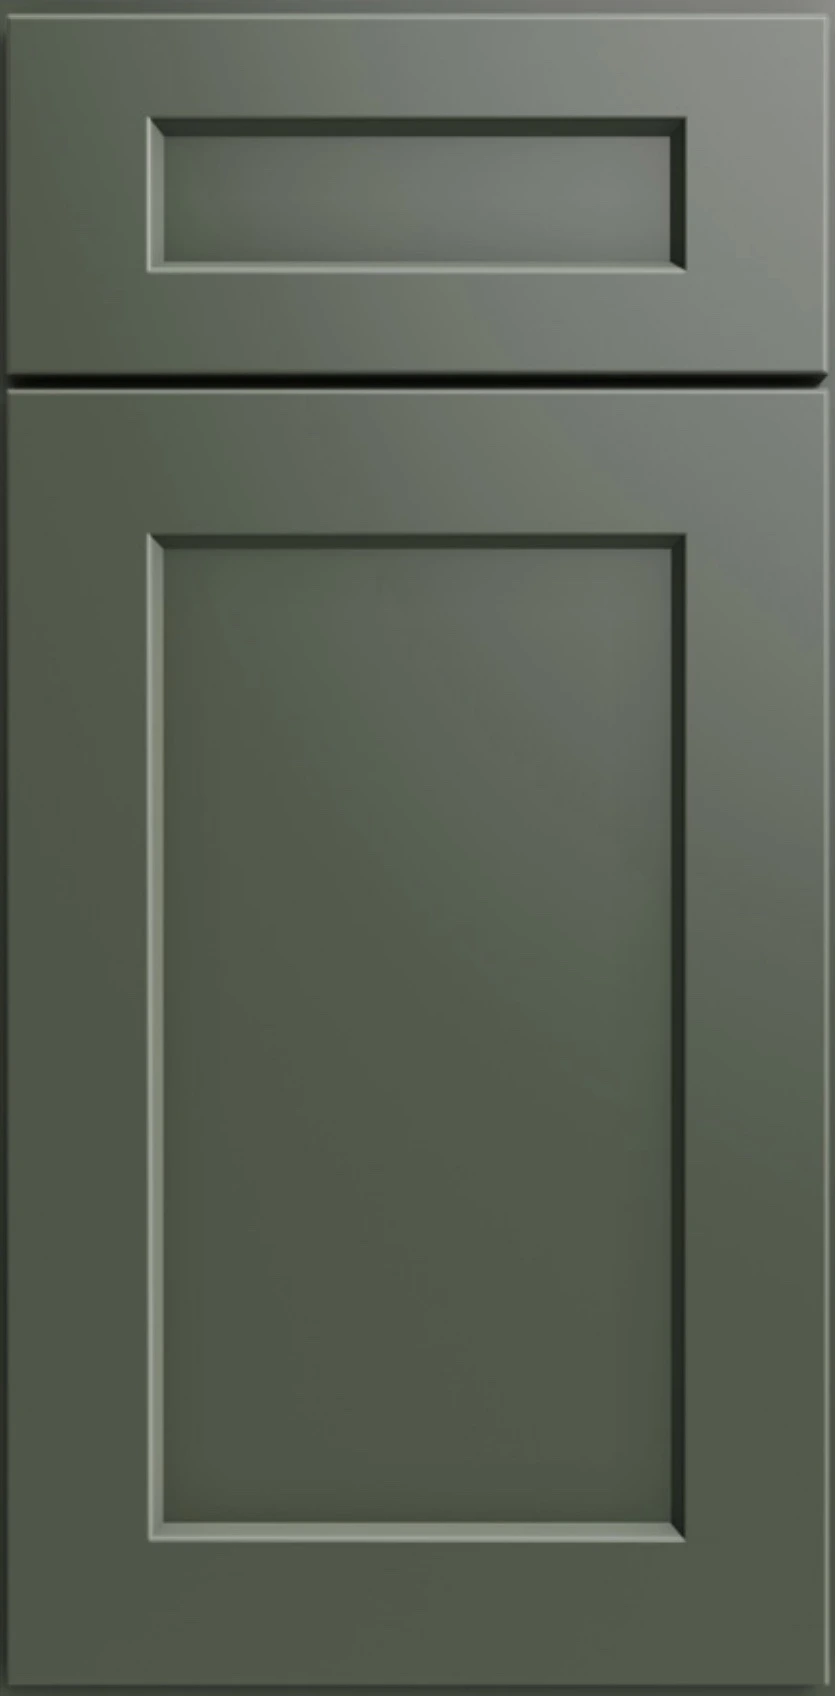
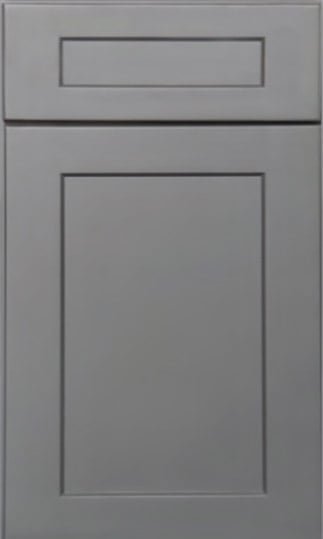
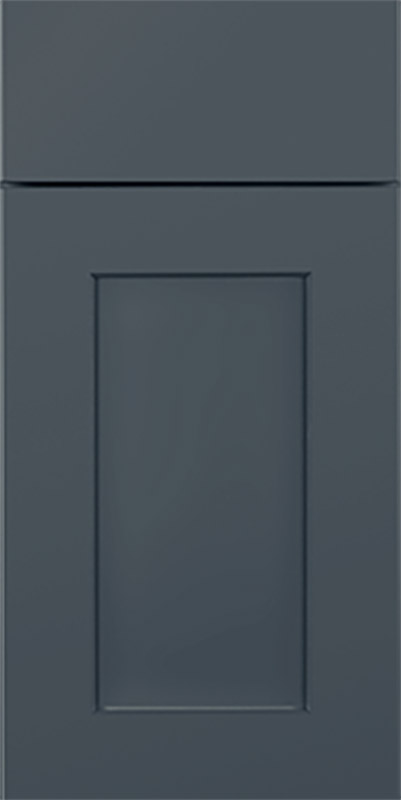
Steel Green Shaker RTA Cabinets
Basic Kitchen Starting at
Order Sample Door
Preview Style
$2260
$1920
(25%↓)
25%
↓

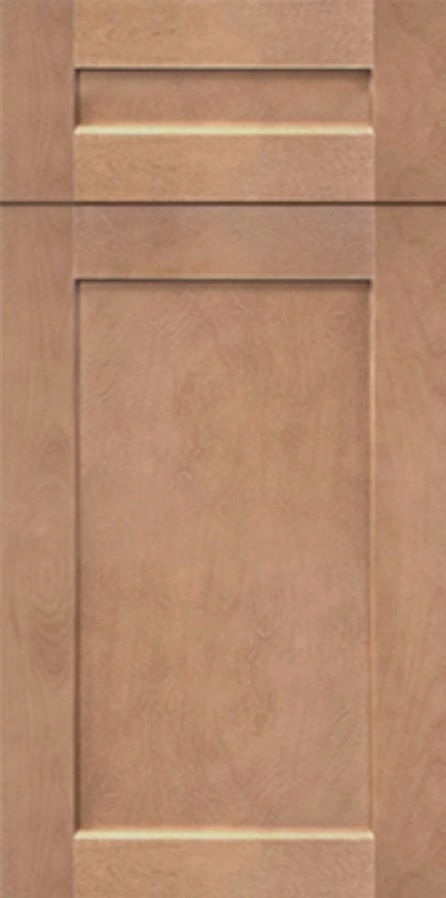
Florence Honey Shaker RTA Cabinets
- Best Seller
- Quick Ship
Basic Kitchen Starting at
Order Sample Door
Preview Style
$2058
$1544
(25%↓)
25%
↓

Unfinished Shaker RTA Cabinets
- Quick Ship
- New
Basic Kitchen Starting at
Order Sample Door
Preview Style
$2079
$1559
(25%↓)
25%
↓

Artisan Shaker RTA Cabinets
Basic Kitchen Starting at
Order Sample Door
Preview Style
$2081
$1561
(25%↓)
25%
↓

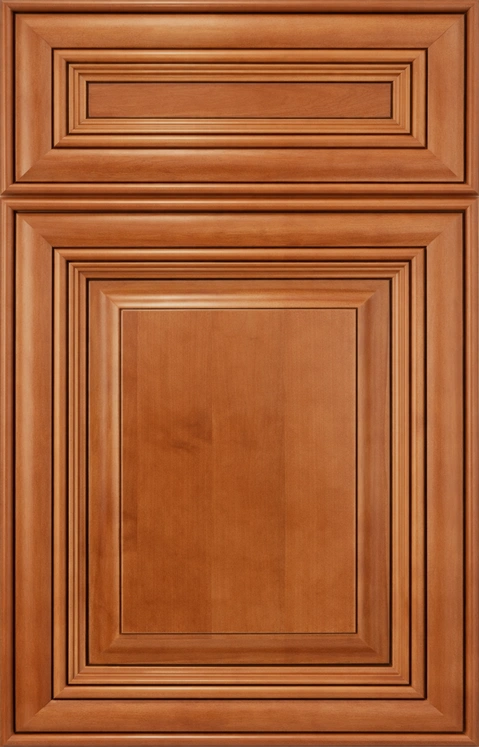
Dark Hickory RTA Cabinets
Basic Kitchen Starting at
Order Sample Door
Preview Style
$2514
$1942
(25%↓)
25%
↓

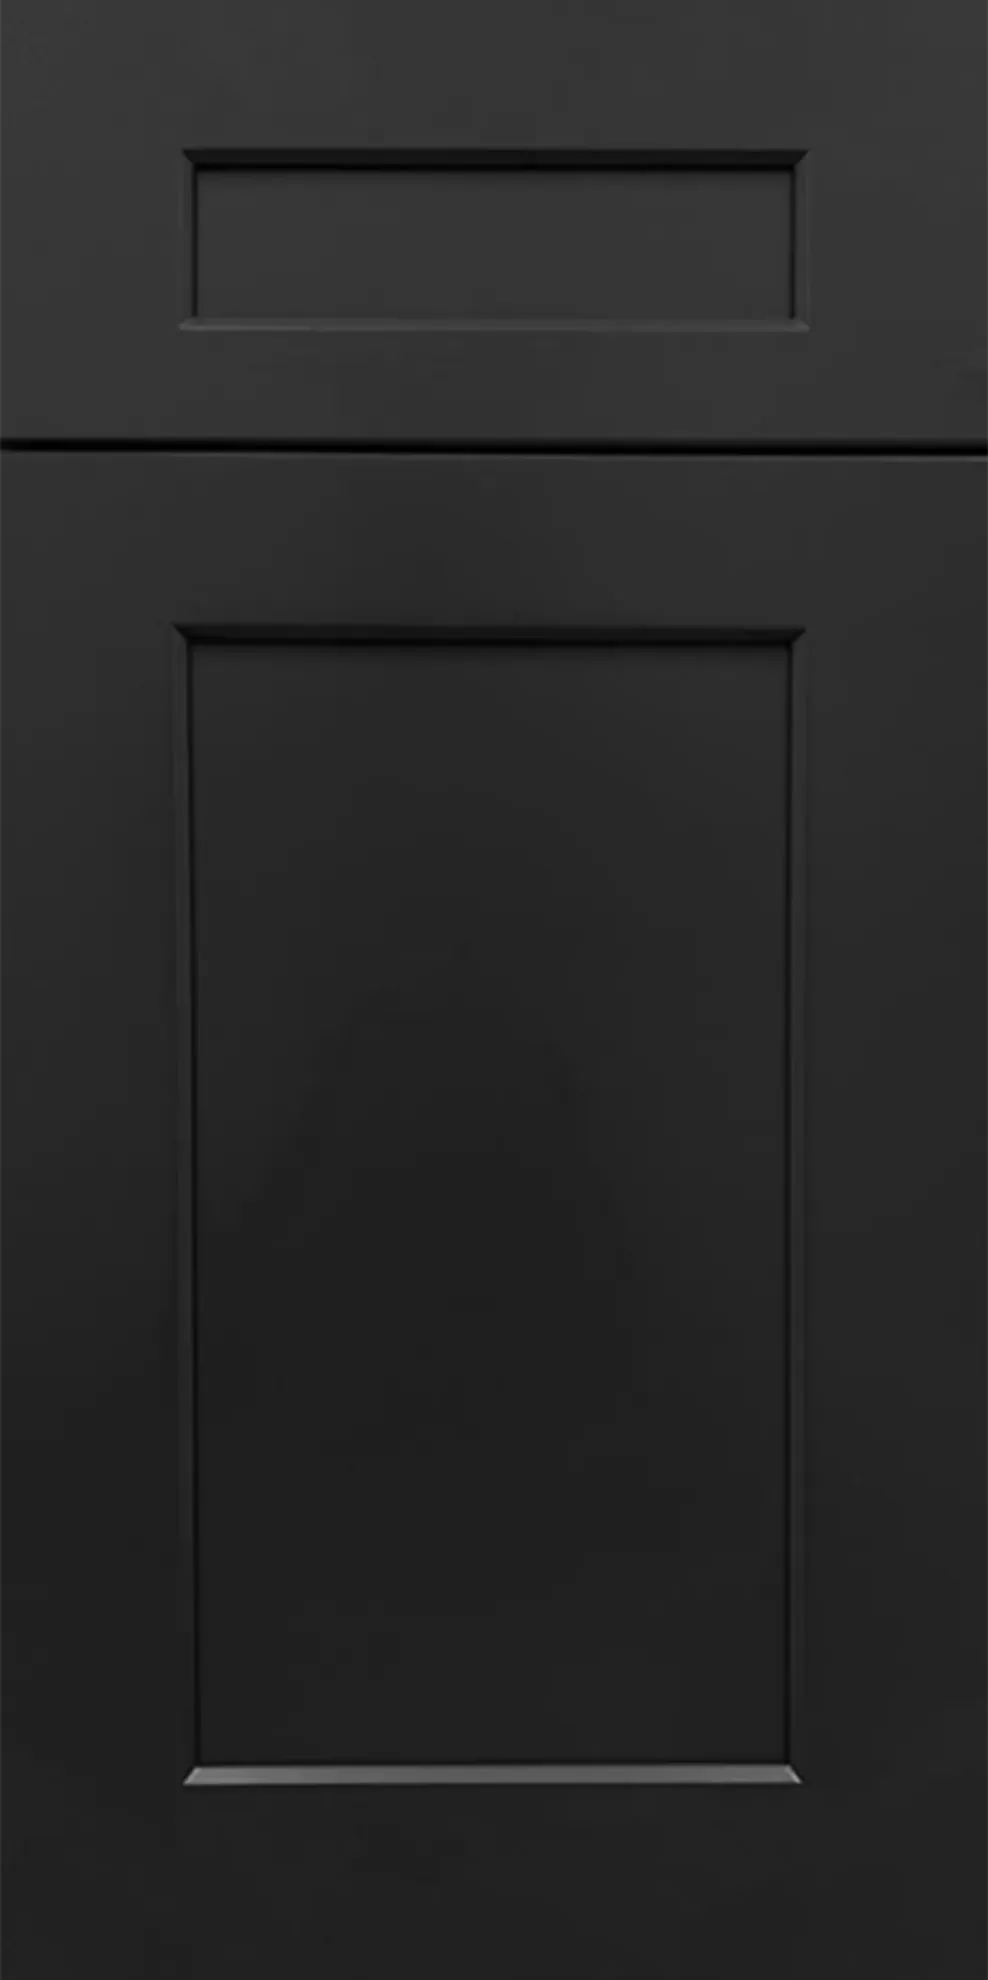
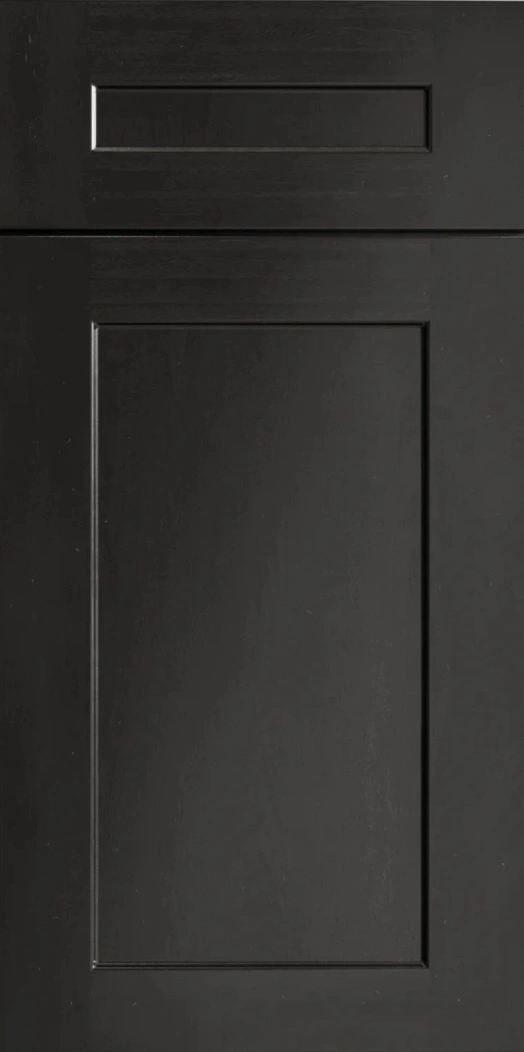
Black Shaker RTA Cabinets
Basic Kitchen Starting at
Order Sample Door
Preview Style
$2430
$1822
(25%↓)
25%
↓

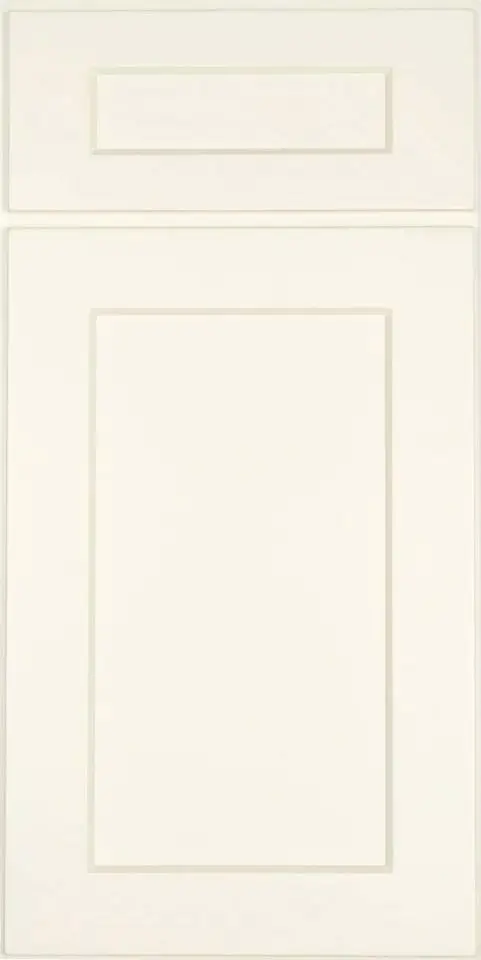
Florence White Shaker RTA Cabinets
- Best Seller
- Quick Ship
Basic Kitchen Starting at
Order Sample Door
Preview Style
$2106
$1580
(25%↓)
25%
↓

Harbor Cream RTA Cabinets
- New
Basic Kitchen Starting at
Order Sample Door
Preview Style
$2485
$1864
(25%↓)

25%
↓

Harbor Ember RTA Cabinets
- New
Basic Kitchen Starting at
Order Sample Door
Preview Style
$2485
$1864
(25%↓)
25%
↓

Frosted White Shaker RTA Cabinets
Basic Kitchen Starting at
Order Sample Door
Preview Style
$2155
$1617
(25%↓)
25%
↓

Natural Shaker RTA Cabinets
Basic Kitchen Starting at
Order Sample Door
Preview Style
$2211
$1658
(25%↓)
25%
↓

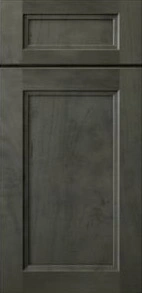
Grizzly Shaker RTA Cabinets
- Best Seller
- Quick Ship
Basic Kitchen Starting at
Order Sample Door
Preview Style
$2273
$1705
(25%↓)
25%
↓

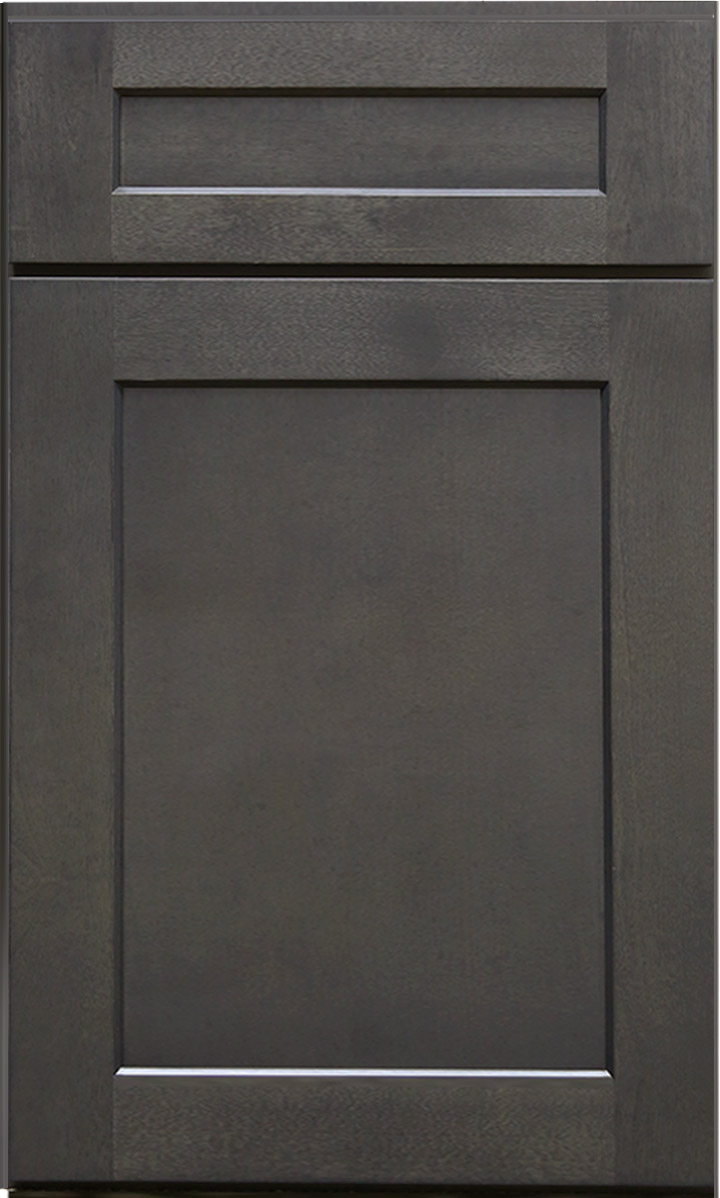
Stone Grey Shaker RTA Cabinets
Basic Kitchen Starting at
Order Sample Door
Preview Style
$2065
$1549
(25%↓)
25%
↓

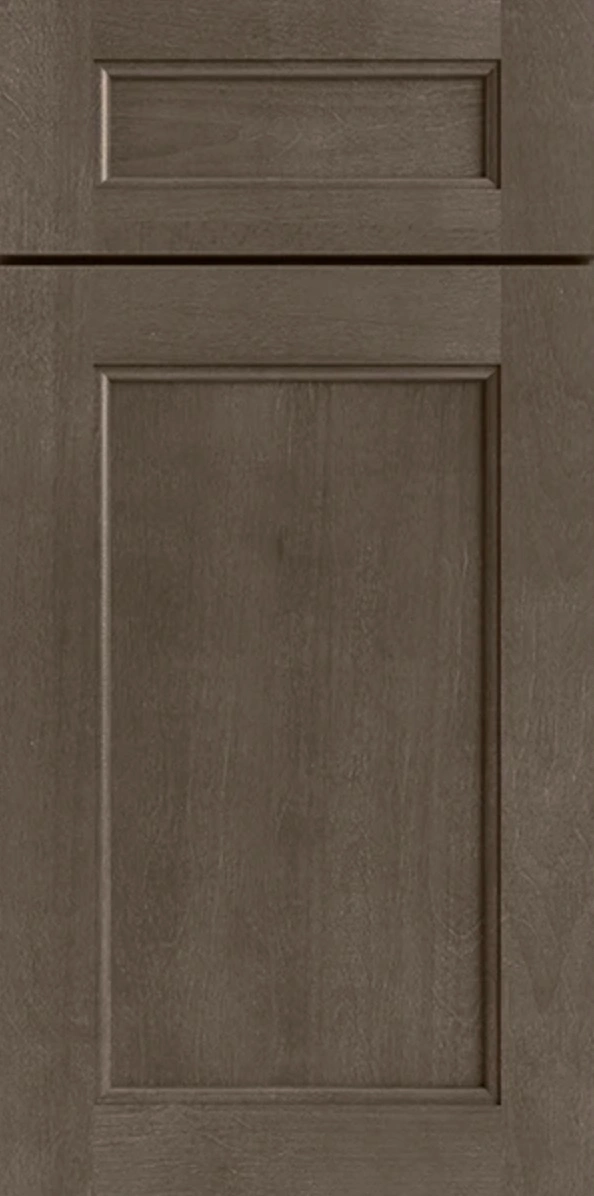
Driftwood Shaker RTA Cabinets
Basic Kitchen Starting at
Order Sample Door
Preview Style
$4032
$3426
(25%↓)
25%
↓

Driftwood Slab RTA Cabinets
Basic Kitchen Starting at
Order Sample Door
Preview Style
$4000
$3399
(25%↓)
25%
↓

Truffle Shaker RTA Cabinets
Basic Kitchen Starting at
Order Sample Door
Preview Style
$3824
$2868
(25%↓)
25%
↓

Truffle Slab RTA Cabinets
Basic Kitchen Starting at
Order Sample Door
Preview Style
$3649
$2737
(25%↓)
25%
↓

Onyx Black Shaker RTA Cabinets
Basic Kitchen Starting at
Order Sample Door
Preview Style
$2554
$1915
(25%↓)
25%
↓

Gunnison Shaker RTA Cabinets
Basic Kitchen Starting at
Order Sample Door
Preview Style
$2086
$1565
(25%↓)
25%
↓

Easton White Slab RTA Cabinets
- Best Seller
- Quick Ship
Basic Kitchen Starting at
Order Sample Door
Preview Style
$1845
$1425
(25%↓)

25%
↓

Rustic Shaker RTA Cabinets
- Quick Ship
Basic Kitchen Starting at
Order Sample Door
Preview Style
$3631
$2723
(25%↓)
25%
↓

Rustic Slab RTA Cabinets
- Quick Ship
Basic Kitchen Starting at
Order Sample Door
Preview Style
$3631
$2723
(25%↓)
25%
↓

Cinder Shaker RTA Cabinets
Basic Kitchen Starting at
Order Sample Door
Preview Style
$2269
$1702
(25%↓)
25%
↓

Mahogany Glazed RTA Cabinets
Basic Kitchen Starting at
Order Sample Door
Preview Style
$2540
$1905
(25%↓)
25%
↓

Florence Slate Shaker RTA Cabinets
- Best Seller
- Quick Ship
Basic Kitchen Starting at
Order Sample Door
Preview Style
$2348
$1761
(25%↓)
25%
↓

Gainsboro Gray RTA Cabinets
Basic Kitchen Starting at
Order Sample Door
Preview Style
$2414
$1811
(25%↓)
35%
↓

West Highland RTA Cabinets
Basic Kitchen Starting at
Order Sample Door
Preview Style
$2239
$1679
(35%↓)
25%
↓

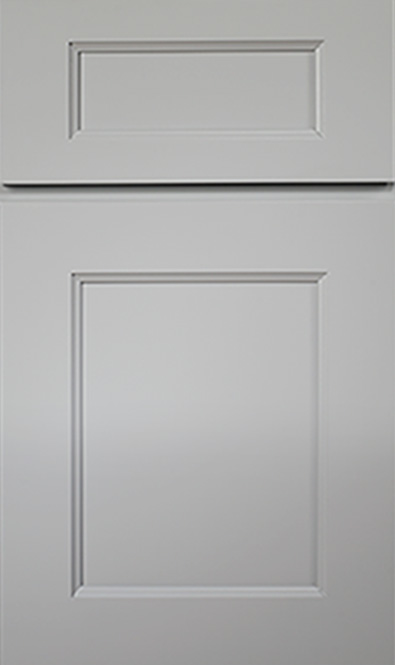
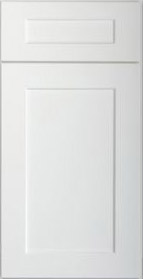
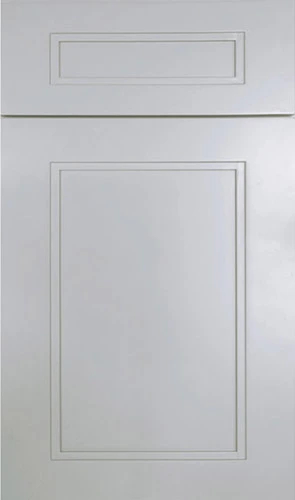
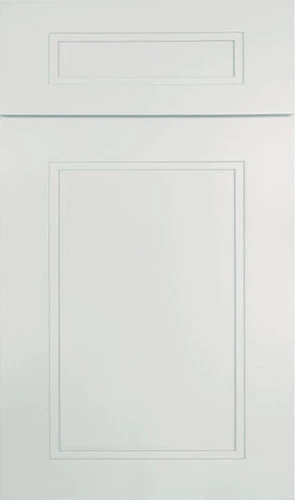
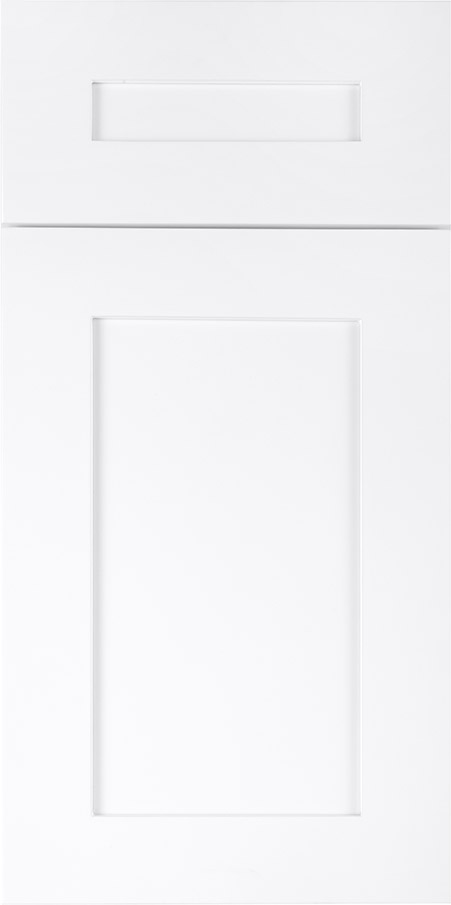
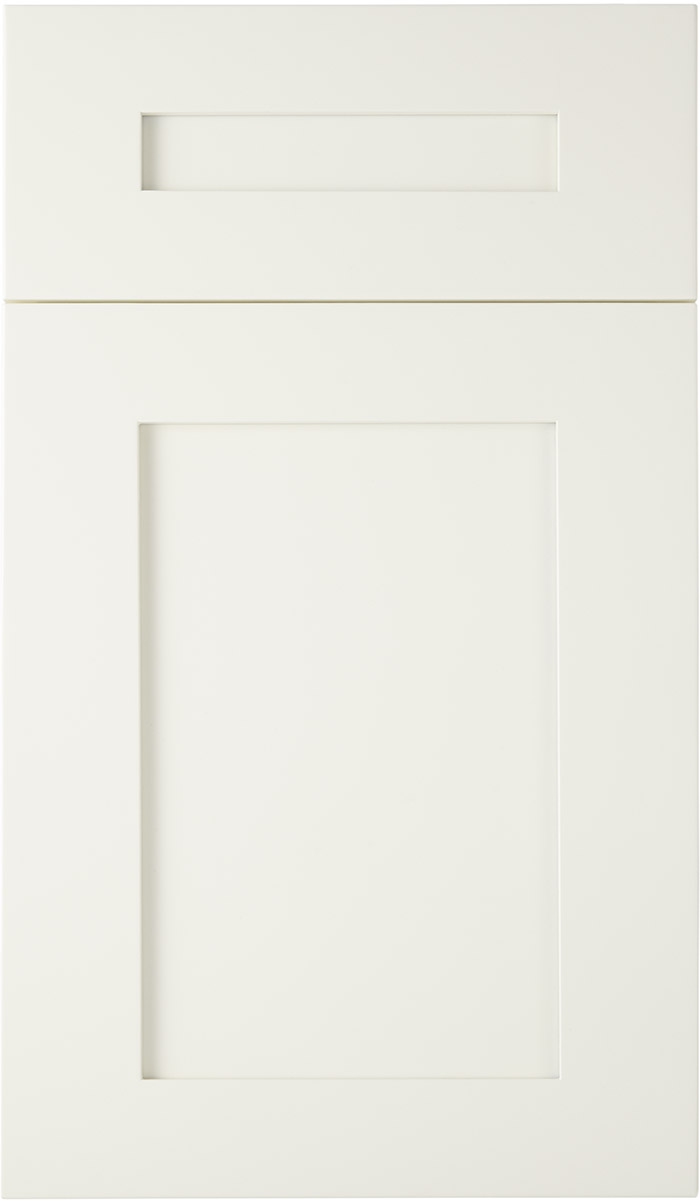
Primary White Shaker RTA Cabinets
- Best Seller
- Quick Ship
Basic Kitchen Starting at
Order Sample Door
Preview Style
$1660
$1245
(25%↓)
25%
↓

Ostland White RTA Cabinets
Basic Kitchen Starting at
Order Sample Door
Preview Style
$2257
$1693
(25%↓)
25%
↓

Smokey Grey RTA Cabinets
Basic Kitchen Starting at
Order Sample Door
Preview Style
$2536
$1902
(25%↓)
25%
↓

Caramel Shaker RTA Cabinets
Basic Kitchen Starting at
Order Sample Door
Preview Style
$2536
$1902
(25%↓)
25%
↓

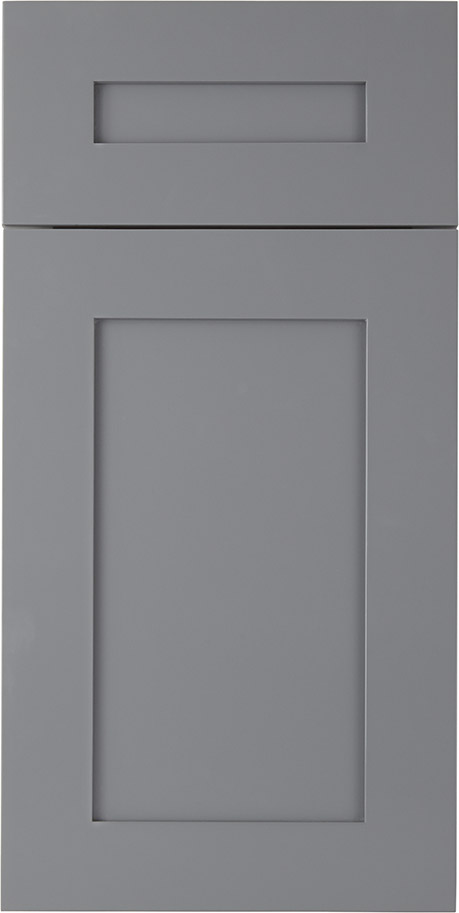
Primary Grey Shaker RTA Cabinets
- Best Seller
- Quick Ship
Basic Kitchen Starting at
Order Sample Door
Preview Style
$1660
$1245
(25%↓)
25%
↓

Riviera White RTA Cabinets
Basic Kitchen Starting at
Order Sample Door
Preview Style
$2538
$1903
(25%↓)
25%
↓

Springfield Shaker RTA Cabinets
Basic Kitchen Starting at
Order Sample Door
Preview Style
$3736
$2802
(25%↓)
25%
↓

Springfield Slab RTA Cabinets
Basic Kitchen Starting at
Order Sample Door
Preview Style
$3609
$2707
(25%↓)
25%
↓

Newtown Shaker RTA Cabinets
Basic Kitchen Starting at
Order Sample Door
Preview Style
$3835
$2877
(25%↓)
25%
↓

Newtown Slab RTA Cabinets
Basic Kitchen Starting at
Order Sample Door
Preview Style
$3562
$2671
(25%↓)
60%
↓

Radnor Shaker RTA Cabinets
Basic Kitchen Starting at
Order Sample Door
Preview Style
$12108
$5487
(60%↓)
60%
↓

Radnor Slab RTA Cabinets
Basic Kitchen Starting at
Order Sample Door
Preview Style
$13052
$5915
(60%↓)
25%
↓

Devon Shaker RTA Cabinets
Basic Kitchen Starting at
Order Sample Door
Preview Style
$3735
$2801
(25%↓)
25%
↓

Devon Slab RTA Cabinets
Basic Kitchen Starting at
Order Sample Door
Preview Style
$3508
$2631
(25%↓)
35%
↓

Carolina Hickory RTA Cabinets
Basic Kitchen Starting at
Order Sample Door
Preview Style
$2595
$1946
(35%↓)
35%
↓

Elegant White Shaker RTA Cabinets
Basic Kitchen Starting at
Order Sample Door
Preview Style
$2651
$1988
(35%↓)

25%
↓

Coastal Sand Shaker RTA Cabinets
- Frameless
- Quick Ship
- New
Basic Kitchen Starting at
Order Sample Door
Preview Style
$2981
$2236
(25%↓)
25%
↓

Coastal Sand Slim Shaker RTA Cabinets
- Frameless
- Quick Ship
- New
Basic Kitchen Starting at
Order Sample Door
Preview Style
$2772
$2592
(25%↓)
25%
↓

Navy Blue Shaker RTA Cabinets
- Frameless
- Quick Ship
Basic Kitchen Starting at
Order Sample Door
Preview Style
$2981
$2236
(25%↓)
25%
↓

Frameless White Shaker RTA Cabinets
- Frameless
- Quick Ship
Basic Kitchen Starting at
Order Sample Door
Preview Style
$2768
$2076
(25%↓)
25%
↓

Storm Grey RTA Cabinets
- Frameless
- Quick Ship
Basic Kitchen Starting at
Order Sample Door
Preview Style
$2768
$2076
(25%↓)
25%
↓

Dove White RTA Cabinets
- Frameless
- Quick Ship
Basic Kitchen Starting at
Order Sample Door
Preview Style
$2505
$1879
(25%↓)
25%
↓

Ivory White Shaker RTA Cabinets
- Frameless
- Quick Ship
Basic Kitchen Starting at
Order Sample Door
Preview Style
$2697
$2023
(25%↓)
25%
↓

Ambrose Raised Panel RTA Cabinets
- Frameless
- Quick Ship
Basic Kitchen Starting at
Order Sample Door
Preview Style
$3646
$2734
(25%↓)
25%
↓

Burnished Brandy RTA Cabinets
Basic Kitchen Starting at
Order Sample Door
Preview Style
$2419
$1814
(25%↓)
About RTA Cabinets
We know you have many options for your bathroom or kitchen cabinets. That's why RTA Cabinet Store provides excellent products, outstanding experiences, and a few perks you can't get anywhere else. Here are some things you should know about our cabinets…
Made for DIYers
RTA (ready to assemble) cabinets are perfect for the DIYer. They arrive at your door ready to assemble and come together quickly. You can also purchase pre-assembled cabinets if DIY isn't your thing.
Our expert designers are standing by to help you select the right bathroom or kitchen cabinet to fit your space and your design style. The best news of all? It's a free design service.
You're never alone. We provide support for your assemble at home cabinets before, during, and after your purchase. Call our customer service reps, send an email, or chat live.
Top Quality (and Quantity)
Our cabinets are constructed with top quality materials like HDF, MDF, hardwood, and plywood. We also build cabinets with excellent craftsmanship like dovetail joinery and other perks like soft close doors. We offer a 5-year warranty on all our cabinets.
Since we are fully online, we are able to offer more kitchen cabinet and bathroom cabinet options than our competitors. It's easy to find the perfect cabinet at RTA Cabinet Store.
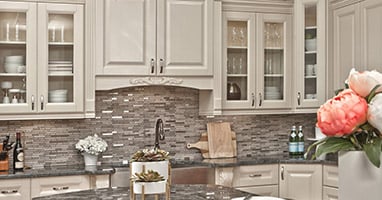
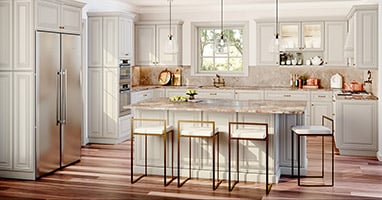
Shop Cabinets by Style and Finish
Choosing the right kitchen cabinets is all about finding a style that matches your home and lifestyle. Explore our most popular cabinet collections:
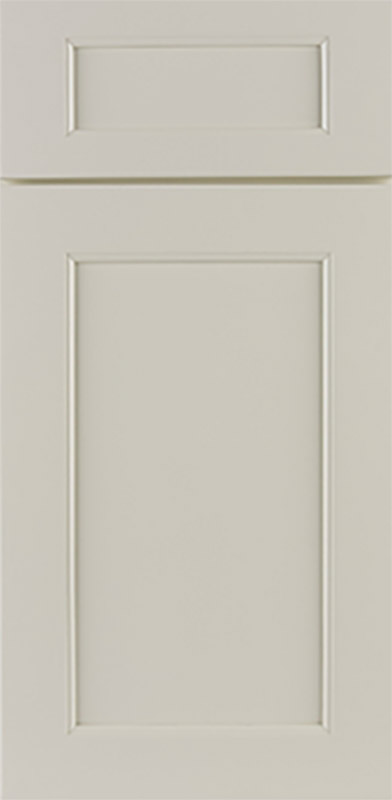
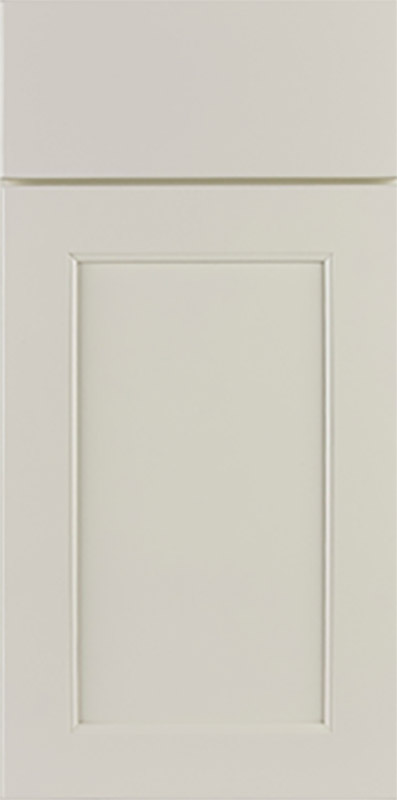
Shaker Kitchen Cabinets: A timeless favorite with clean lines and versatile appeal.
White Kitchen Cabinets: Brighten your kitchen with a fresh, airy look.
Green Kitchen Cabinets: Add a bold, nature-inspired touch.
Blue Kitchen Cabinets: Create a calm, coastal, or modern statement.
Grey Kitchen Cabinets: Sleek and contemporary with a neutral tone.
Dark Kitchen Cabinets: Rich finishes for dramatic and elegant designs.
Frameless Kitchen Cabinets: European-inspired, with a modern seamless look.
Traditional Kitchen Cabinets: Classic designs with timeless detail.
Framed Kitchen Cabinets: Sturdy construction with a defined border for each door.
Flat Panel Kitchen Cabinets: Minimalist style for a streamlined space.
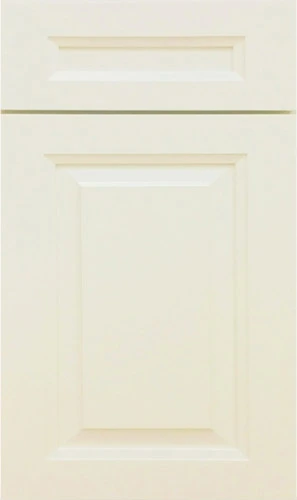
Raised Panel Kitchen Cabinets: A touch of dimension for a more decorative aesthetic.
Lowest Price
We have the best prices you'll find anywhere online or off. If you are quoted a better price for the same cabinet, we'll beat it by 5%.
Quick Shipping
Select bathroom or kitchen cabinets from our Quick Ship Guarantee™ program and we'll make sure that your entire order leaves our warehouse within 3 business days. We'll refund you 10% of your order if we don't.
RTA Cabinet Store is the only one in the industry offering a guarantee like this. Keep your project on time with the precision of quick shipping.
Refundable Samples
Get traditional swatches or full door samples shipped to you so you can compare colors and styles to your heart's content. If you order full door samples, you can return them to us for a refund toward your purchase.
Trade Pro Loyalty Program
Professionals love our cabinets too! We take special care of our trade pro customers. Create an account and you'll be on your way to getting discounts and volume pricing.
You'll get an RTA Cabinet Store representative at your disposal to help you plan your projects and get everything to the project seamlessly.
Check Out Our Blogs

Reach out to our design team. Get a quote.
One of our awesome kitchen designers will help you design your kitchen.
Multiple Ways to Get Started
Refundable Cabinet Sample Doors$4.99
Find your style and taste your dream Kitchen before you buy.

Work with a Designer
A FREE, no obligation professional kitchen design consultation with one of our expertly trained designers (a $500 value).

Kitchen Measurement Help
We provide a step-by-step guide which will walk you through all the measurements you need.
Get Your Dream Kitchen Designed for FREE!
The staff at RTACabinetStore.com will provide you with a FREE, no obligation professional kitchen design consultation with one of our expertly trained designers (a $500 value).

